The paradox of the chicken breast is well-known to anyone pursuing a fitness goal or a cleaner diet: it is the ultimate lean protein, yet it is arguably the most difficult meat to cook correctly. Because it lacks the insulating fat of the thigh or the connective tissue of the drumstick, the margin between “perfectly succulent” and “culinary cardboard” is measured in mere minutes.
Most people seeking healthy chicken breast recipes suffer from the “dryness trap.” They overcook the meat out of a misplaced fear of foodborne illness or fail to season it deeply enough, resulting in a repetitive, uninspiring meal prep routine. This guide deconstructs the science of lean protein to provide a masterclass in flavor extraction and moisture retention. We aren’t just looking at one dish; we are exploring the fundamental mechanics of the Mediterranean Lemon-Herb Pan-Sear, a technique that serves as the foundation for hundreds of other healthy variations.
Ingredient Breakdown: The Functional Role of Flavors
To execute high-level healthy chicken breast recipes, every component must serve a dual purpose: enhancing the meat’s texture while maintaining a low-calorie, nutrient-dense profile.
1. The Lean Protein (Air-Chilled Chicken)
When shopping for chicken, look for “air-chilled” labels. Standard chicken is often chilled in water baths, meaning the meat absorbs excess water. When you cook it, that water leaches out, causing the chicken to “stew” in the pan rather than sear. Air-chilled chicken retains its natural juices, resulting in a more concentrated flavor and a better crust.
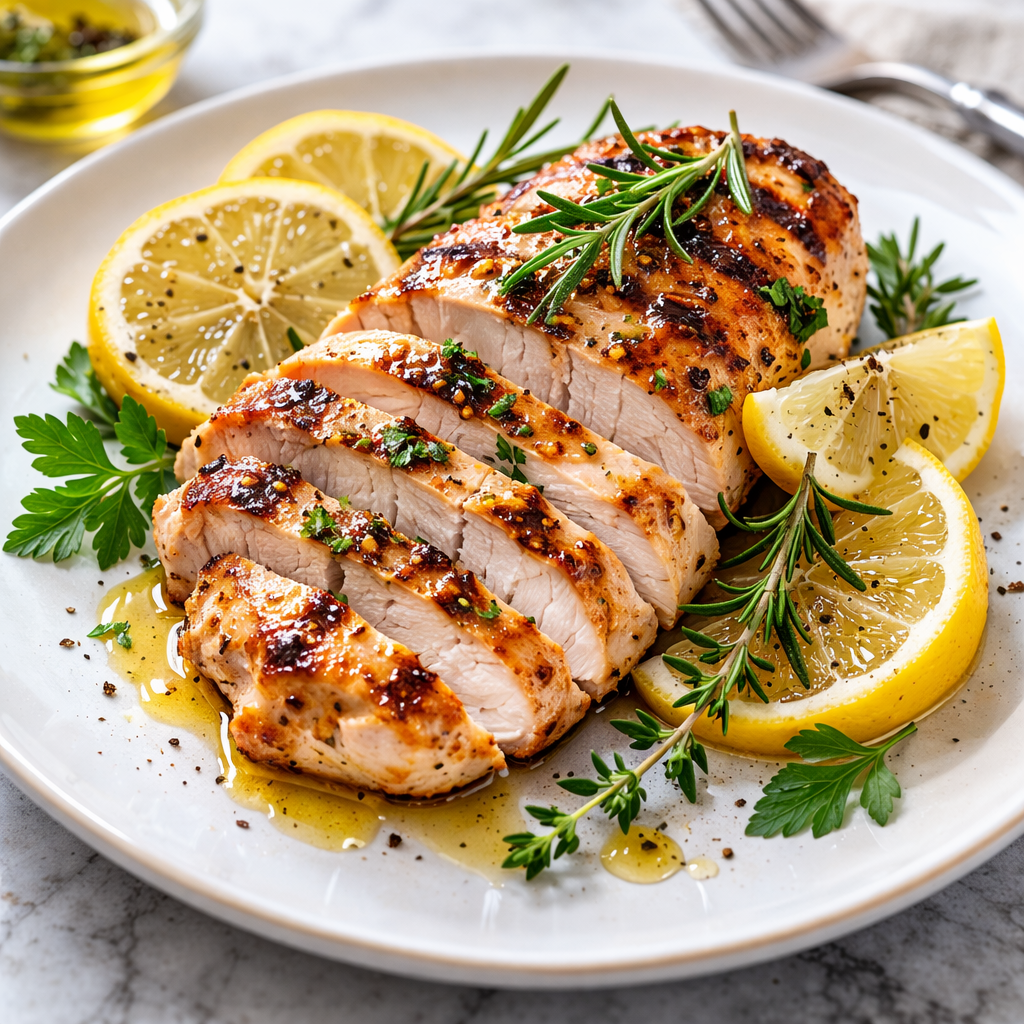
2. The Acid (Lemon Juice and Zest)
Acid serves as a chemical tenderizer. In healthy chicken breast recipes, lemon juice doesn’t just provide a bright top note; it begins to break down the tough exterior muscle fibers, allowing moisture to penetrate deeper into the breast. The zest contains essential oils that provide aroma without the sharp “bite” of the juice.
3. The Healthy Fat (Extra Virgin Olive Oil)
While we are keeping things healthy, fat is the vehicle for flavor. Olive oil has a relatively low smoke point, making it ideal for the medium-heat searing required for chicken breasts. It provides a barrier that prevents the delicate proteins from sticking to the pan.
4. The Aromatics (Fresh Garlic and Oregano)
Garlic contains allicin, which provides a savory “umami” depth that mimics the richness of heavier meats. Fresh oregano and thyme add earthiness. When herbs are heated in oil, their fat-soluble compounds are released, infusing the entire breast with flavor rather than just sitting on the surface.
Preparation Strategy: The “Dry-Brine” and the “Leveling”
The secret to professional-grade chicken doesn’t happen in the pan; it happens on the cutting board.
- The Leveling (Mechanical Tenderization): Chicken breasts are naturally asymmetrical—thick at one end and tapered at the other. If you cook them as-is, the thin end will be dry before the thick end is safe to eat. Use a meat mallet or a heavy skillet to lightly pound the thickest part of the breast until the entire piece is a uniform thickness (about ¾ of an inch).
- The Dry-Brine: Salt is the only seasoning that can truly penetrate the interior of the meat. Season your chicken with sea salt at least 30 minutes before cooking (up to 4 hours). This allows the salt to dissolve the muscle proteins, which then trap water molecules during the cooking process. This is the #1 way to ensure your healthy chicken breast recipes remain moist.
- Surface Moisture Management: Before the chicken hits the pan, pat it bone-dry with a paper towel. Moisture is the enemy of the Maillard reaction (browning). If the surface is wet, the energy of the pan goes into evaporating the water rather than searing the meat.
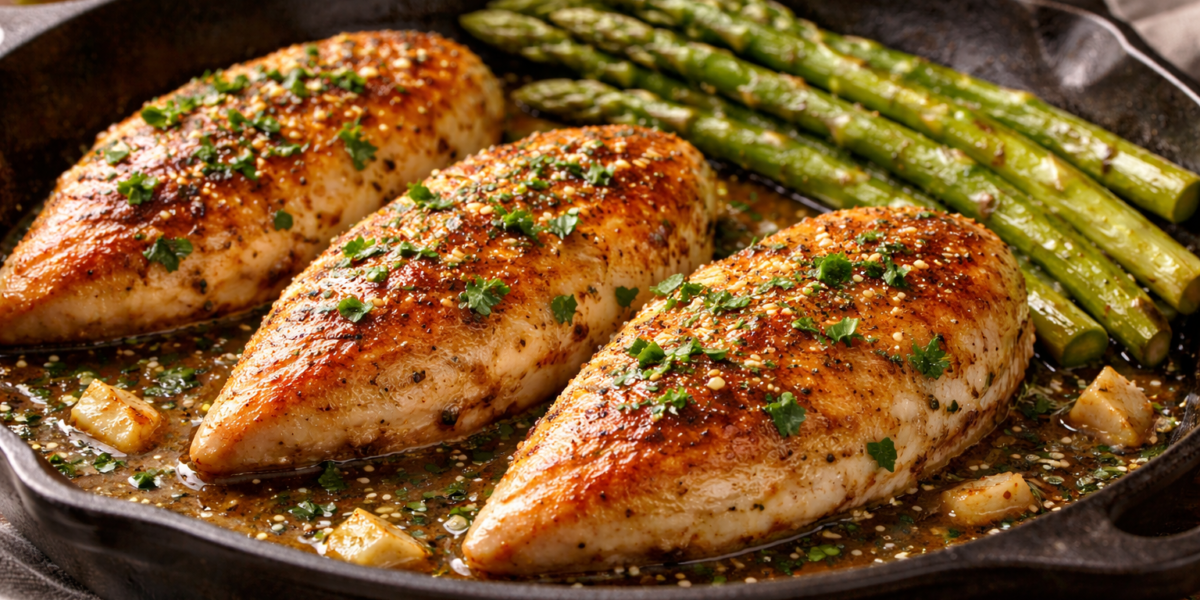
Cooking Instructions: The Pan-Sear Method
This method focuses on the “Golden Crust” technique, which is the gold standard for healthy chicken breast recipes.
- The Tempering: Take your seasoned chicken out of the fridge 15 minutes before cooking. Bringing the meat closer to room temperature ensures a more even cook from the edges to the center.
- Pan Selection: Use a heavy-bottomed stainless steel or cast-iron skillet. These materials hold heat more effectively than thin non-stick pans.
- The Heat-Up: Heat your skillet over medium-high heat. Add 1 tablespoon of olive oil. You know the pan is ready when the oil “shimmers” and moves across the pan like water.
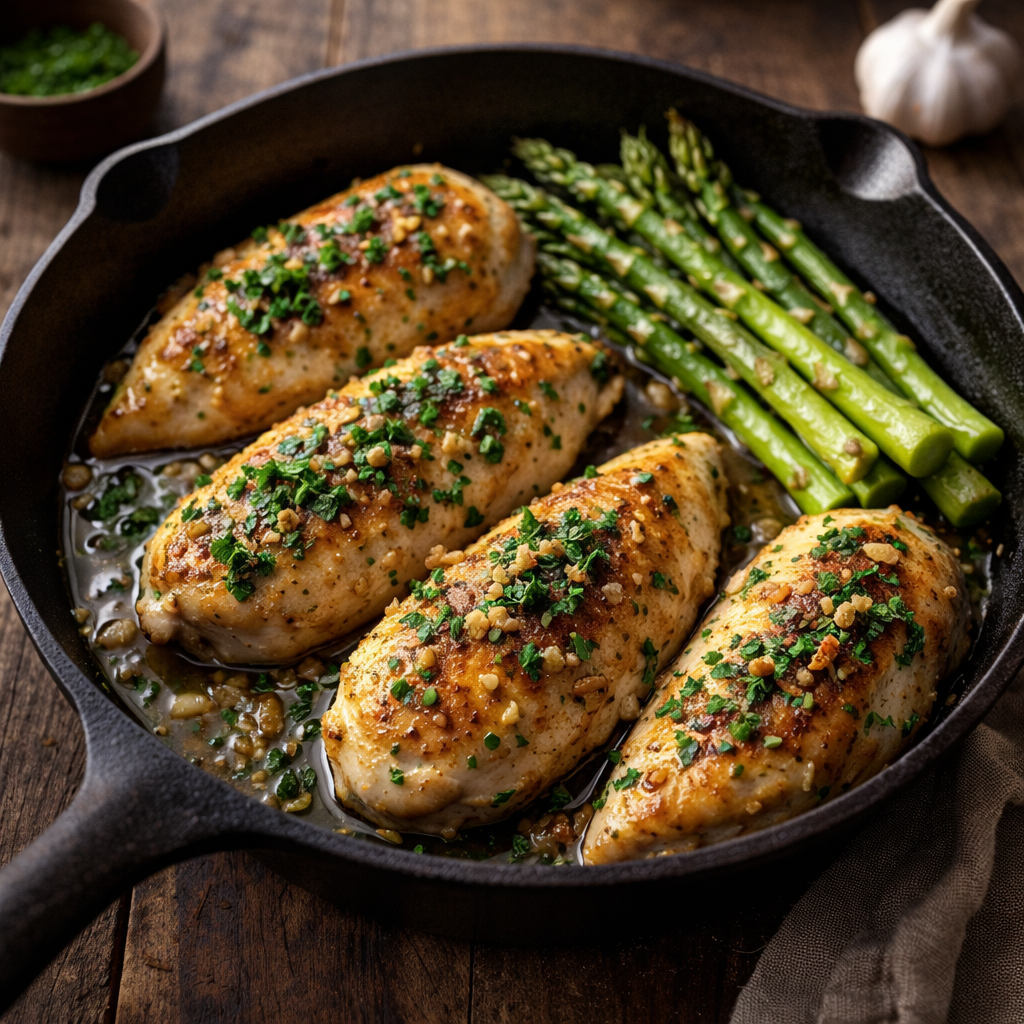
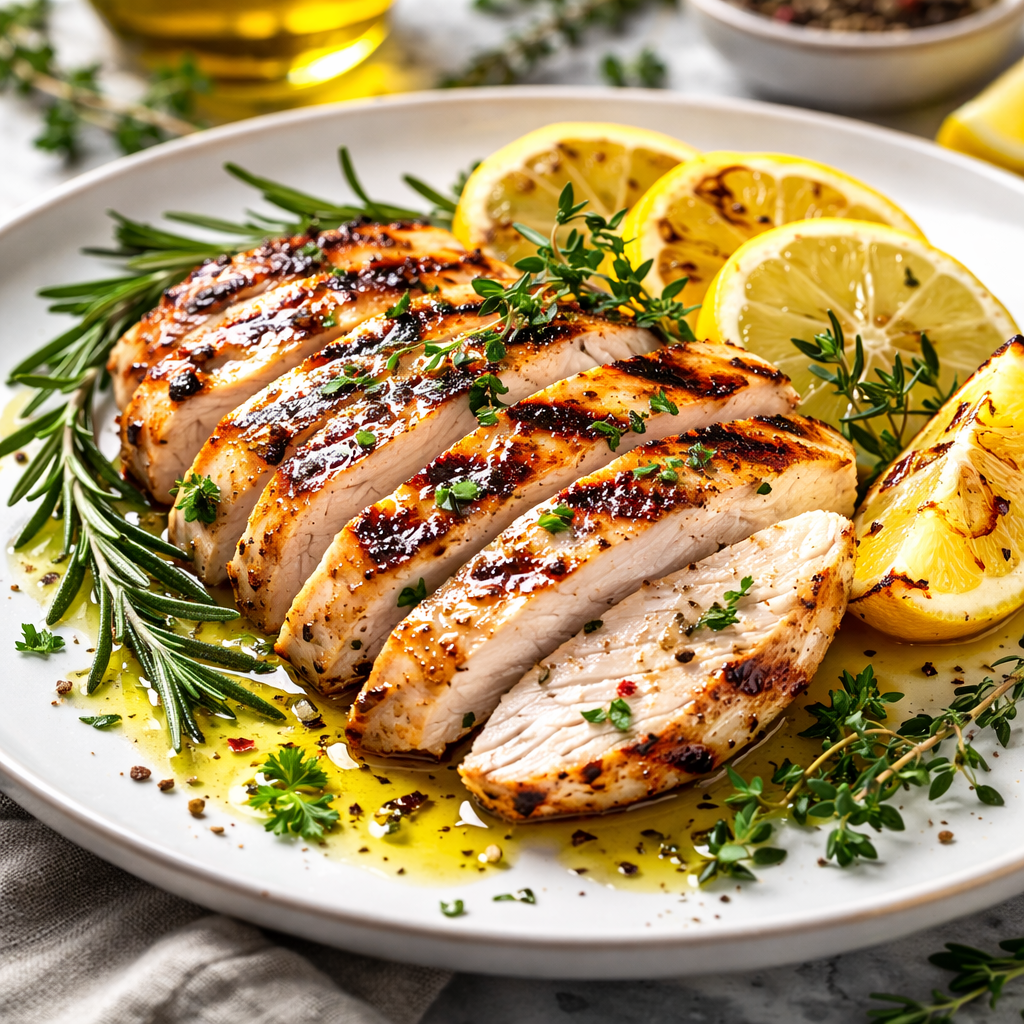
- The Initial Sear: Lay the chicken breasts into the pan, moving away from you to avoid oil splatter. Do not touch them. Let them sear for 5–6 minutes. The chicken will “release” from the pan naturally once a golden-brown crust has formed. If it’s sticking, it isn’t ready to be flipped.
- The Flip and Baste: Flip the chicken. Immediately reduce the heat to medium. Add your minced garlic, lemon zest, and fresh herbs to the pan. Because the heat is lower now, the garlic will perfume the oil without burning.
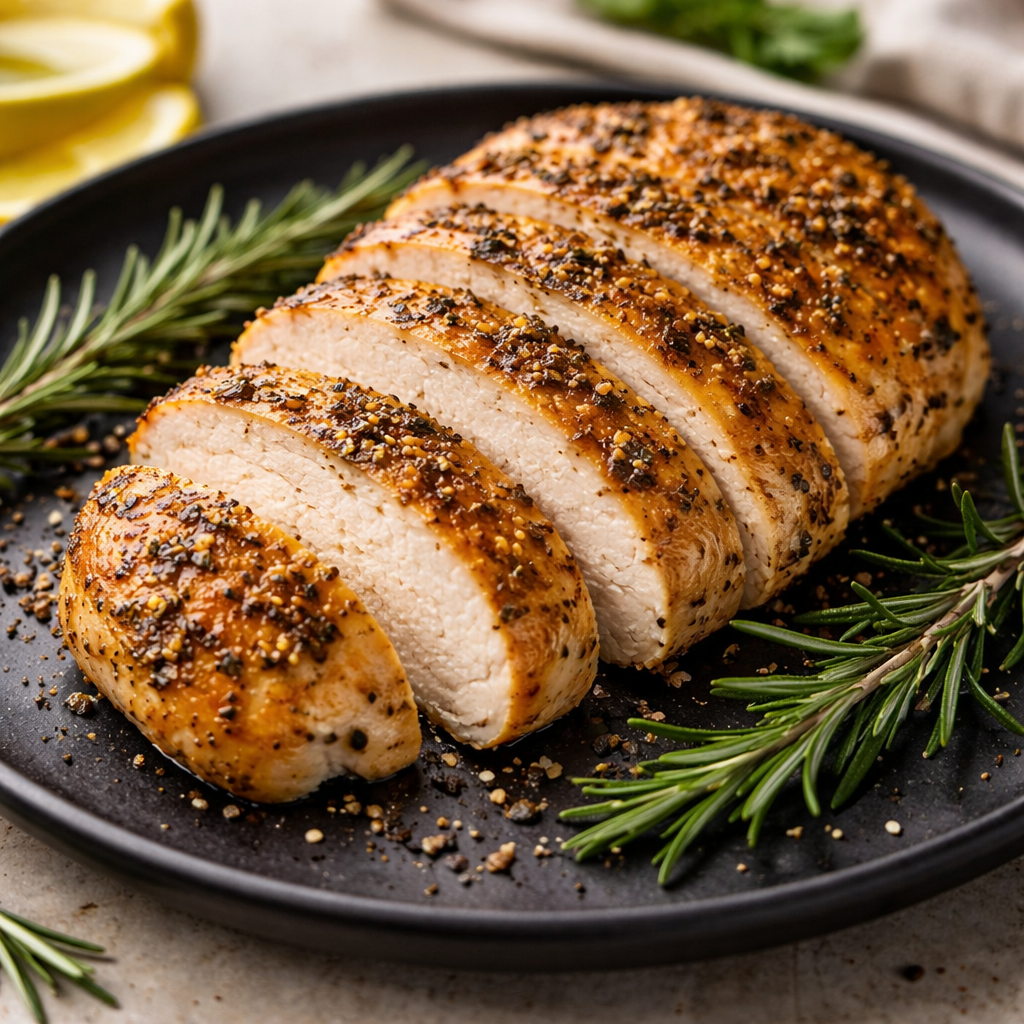
- The Finish: Cook for another 4–5 minutes. Use a meat thermometer to check the internal temperature. Pull the chicken at 160°F (71°C). 7. The Rest (Crucial): Transfer the chicken to a warm plate and tent loosely with foil. Let it rest for 5–10 minutes. During this time, “carry-over cooking” will bring the internal temp to the safe 165°F, and the fibers will relax, locking the juices inside.
Flavor & Texture Indicators
A successfully executed healthy chicken breast recipe should be evaluated based on these three professional markers:
- The “Spring” Test: When you press the center of the rested chicken with your finger, it should feel firm but have a noticeable “spring” or bounce. If it feels hard or “woody,” it is overcooked.
- The Juice Clarity: When you finally slice into the breast, the juices should be clear, not pink. If the juices are cloudy or absent, the meat was either cooked too fast or not rested long enough.
- The Crust Color: A perfect sear should look like a “well-worn penny”—a deep, golden-bronze. This indicates that the sugars and proteins have caramelized, providing a savory crunch that offsets the tender interior.
Adjustments for Different Skill Levels
For the Beginner
Focus exclusively on the thermometer. Don’t try to “guess” doneness by cutting into the meat (which lets all the juice out). An inexpensive digital thermometer is your best friend in the quest for healthy chicken breast recipes.
For the Intermediate Cook
Master the “Pan Sauce.” After removing the chicken to rest, deglaze the hot pan with a splash of chicken broth or white wine. Scrape up the browned bits, whisk in a teaspoon of Dijon mustard, and pour this over your chicken. It adds massive flavor for almost zero extra calories.
For the Advanced Artisan
Experiment with “Velveting”—a Chinese technique often used in healthy stir-frys. Coat the chicken in a light mixture of egg white and cornstarch before poaching or searing. This creates a protective barrier that results in an incredibly silky, tender texture that is virtually impossible to dry out.
Storage & Shelf Life
Healthy eating usually involves meal prep, making storage a vital part of any healthy chicken breast recipe guide.
- Refrigeration: Store cooked breasts in an airtight container for up to 4 days. To keep them moist, store them whole rather than pre-sliced.
- The Reheating Hack: To avoid the “rubbery” texture of microwaved chicken, reheat your breast in a covered skillet with two tablespoons of water or broth over low heat. The steam will gently warm the meat without extracting the remaining moisture.
- Freezing: Cooked chicken can be frozen for up to 3 months. For best results, wrap each breast tightly in plastic wrap before placing them in a freezer bag to prevent freezer burn.
Homemade Apricot Chicken Recipe
Reader Questions
Q: Is it safe to eat chicken if it’s slightly pink but the thermometer says 165°F? A: Yes. Pinkness in chicken can be caused by various factors, including the age of the bird or the pH level of the meat. If your calibrated thermometer reads 165°F after resting, the chicken is safe to consume regardless of a slight rosy tint.
Q: Can I use this method for frozen chicken breasts? A: You must thaw the chicken completely first. Cooking from frozen results in an exterior that is overcooked and an interior that is potentially unsafe. For the best texture in healthy chicken breast recipes, thaw overnight in the refrigerator.
Q: How do I stop my chicken from sticking to the stainless steel pan? A: This is usually a result of “pan panic.” If the pan is hot enough and the meat has enough oil, it will stick initially but will “self-release” once the proteins have caramelized. Wait for the pan to tell you when it’s time to flip.
Q: What is the healthiest way to cook chicken breast? A: Poaching or steaming are technically the “lightest” as they require no added fat. However, pan-searing with a small amount of heart-healthy olive oil provides significantly more flavor and satiety, which often leads to better long-term dietary adherence.