Vanilla Mug Cake Recipe The most persistent frustration with the average vanilla mug cake recipe is the dreaded “rubber-sponge” texture. We have all been there: a late-night craving strikes, you mix a few pantry staples in a ceramic cup, microwave it for a minute, and end up with a chewy, dry, or unpleasantly “eggy” puck of dough. Most microwave cakes fail because they treat the microwave like a traditional oven, ignoring the fact that a microwave is essentially a high-speed steamer that vibrates water molecules rather than surrounding food with dry, ambient heat.
Achieving a bakery-quality easy vanilla mug cake requires a specialized understanding of moisture ratios and fat content. To get that light, tender, and velvet-like crumb, you must move away from using a whole egg—which is too much protein for a single serving—and focus on the “emulsified fat” method. This guide deconstructs the science of microwave baking to ensure your homemade mug cake is a succulent, fluffy masterpiece that rivals a traditional oven-baked cupcake.
Why This Recipe Works
This best vanilla mug cake recipe succeeds by utilizing a precise chemical balance designed specifically for electromagnetic radiation cooking.
- The Eggless Advantage: Most mug cakes are too small for one whole egg. Using a full egg creates a rubbery, “omelet-like” texture. By substituting the egg with extra fat (melted butter) and a touch more leavening, we achieve a tender crumb that doesn’t seize up as it cools.
- Controlled Hydration: We use a specific ratio of milk to flour that accounts for the rapid evaporation that occurs in a microwave. This prevents the cake from turning into a dry brick within minutes of leaving the microwave.
- The “Liner” Effect: By mixing the batter directly in the mug and ensuring the fats are well-incorporated, we create a self-lubricating surface that prevents the cake from sticking to the ceramic walls.
- Vanilla Bloom: Because microwave cooking is so fast, we “bloom” the vanilla extract in the melted butter. This ensures the aromatic oils are distributed throughout the crumb, providing a deep, professional flavor profile in under 90 seconds.
Ingredients & Measurements
For a professional-grade vanilla mug cake, use a standard 12-ounce ceramic mug. Do not use an oversized “latte” bowl, as the batter will spread too thin and dry out.
The Dry Base
- 4 tbsp All-Purpose Flour: Level tablespoons, not heaping.
- 2 tbsp Granulated Sugar: Provides sweetness and aids in moisture retention.
- 1/2 tsp Baking Powder: Essential for the rapid “lift” needed in microwave baking.
- 1/16 tsp (a pinch) Sea Salt: To sharpen the vanilla notes and balance the sugar.
The Wet Emulsion
- 3 tbsp Whole Milk: Room temperature is best to prevent the butter from re-solidifying.
- 1 1/2 tbsp Unsalted Butter: Melted and slightly cooled. (Alternatively, use 1 tbsp of neutral oil for a slightly springier texture).
- 1/2 tsp Pure Vanilla Bean Paste or Extract: Use the highest quality possible, as vanilla is the star of the show.
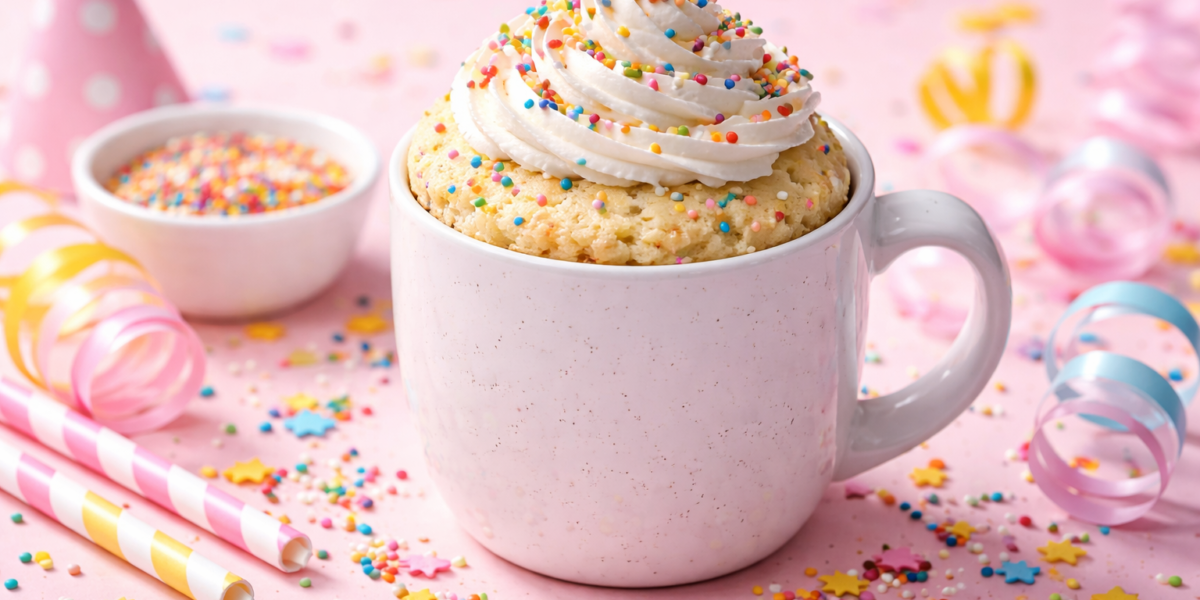
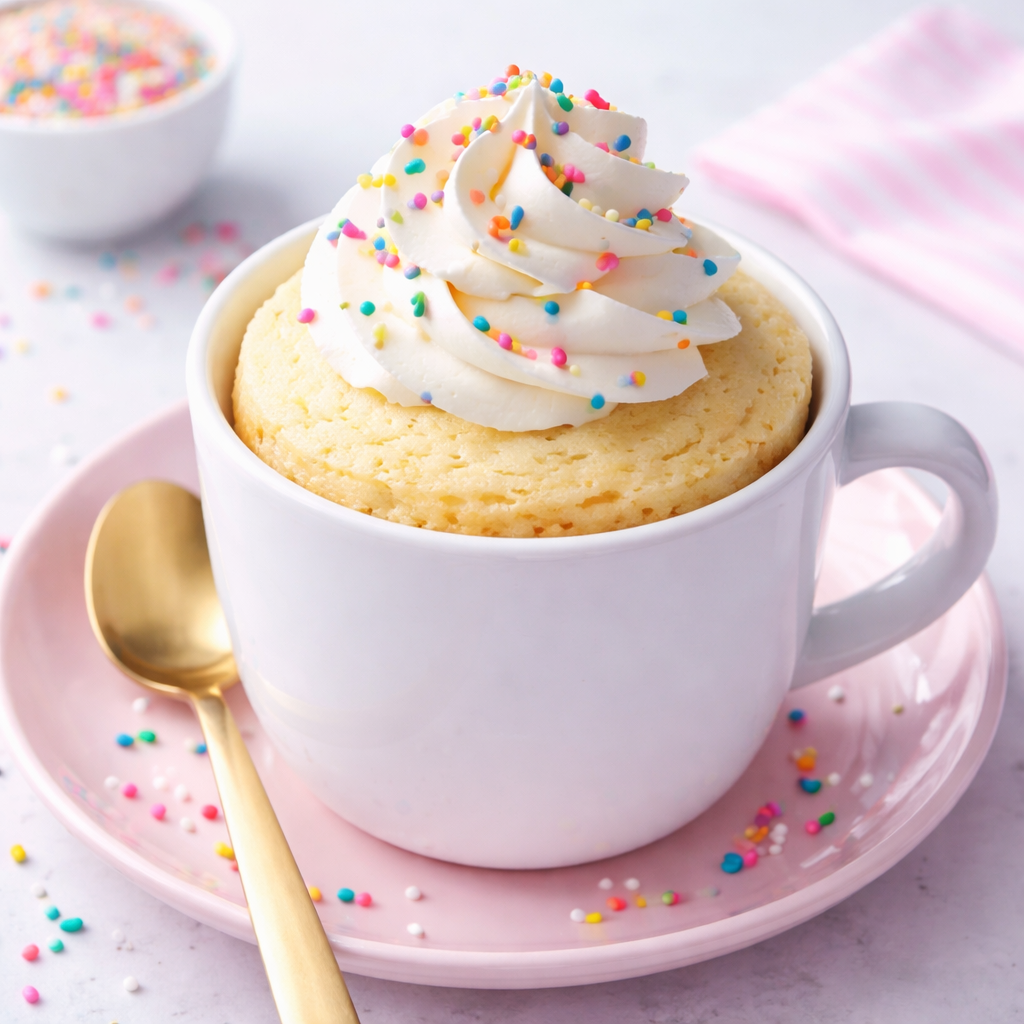
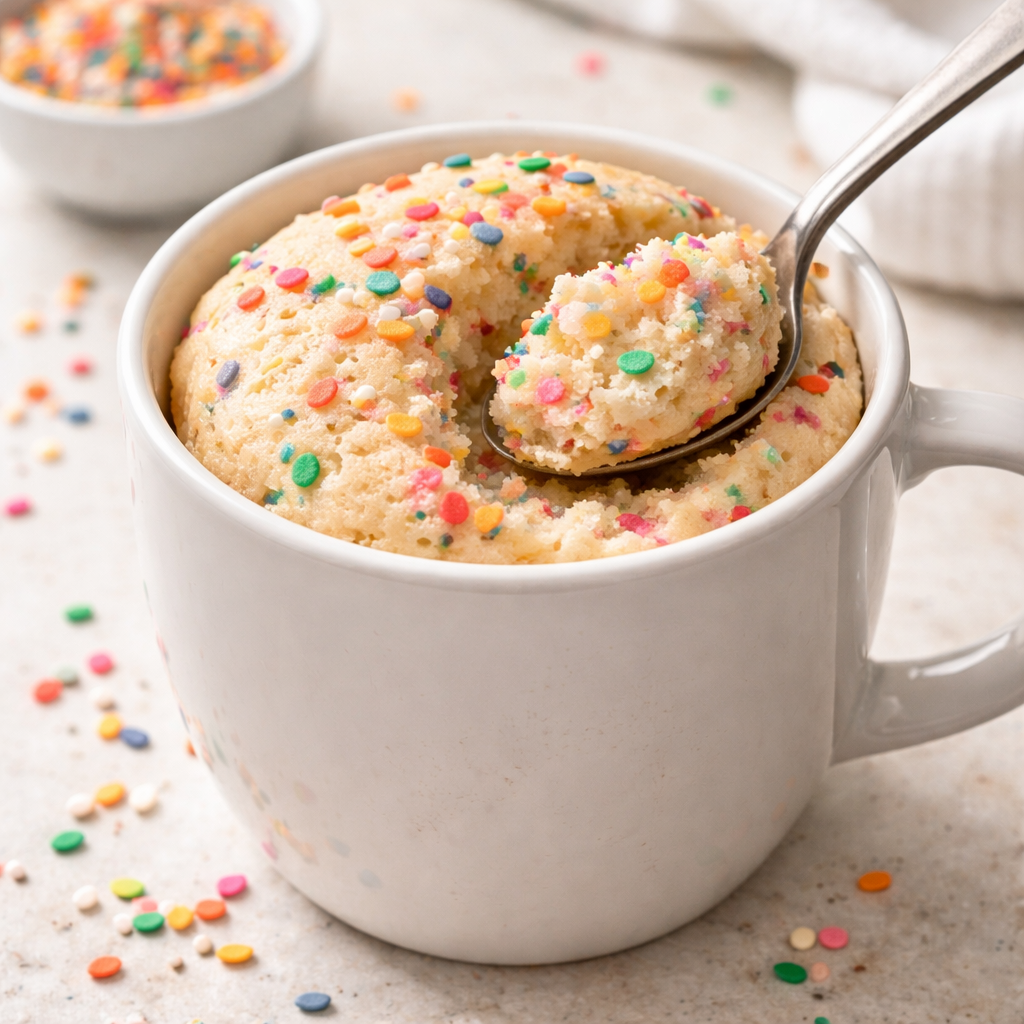
- 1 tbsp Sprinkles (Optional): To transform this into a Funfetti mug cake.
Step-by-Step Cooking Guide
1. The “Whisk-in-Mug” Method
In your microwave-safe mug, whisk together the flour, sugar, baking powder, and salt. Use a small fork to ensure there are no lumps of flour. Eliminating lumps at the dry stage is easier than trying to stir them out once the liquid is added.
2. The Liquid Integration
Pour in the milk, melted butter, and vanilla. Stir with the fork until the batter is smooth. Pro Tip: Make sure to scrape the “corners” at the bottom of the mug where dry flour likes to hide. The batter should be thick but pourable—similar to a heavy pancake batter.
3. The “Flavor Pocket” (Optional)
If you want a molten center, drop a teaspoon of white chocolate chips or a dollop of strawberry jam into the center of the batter. Do not stir it in; let it sit in the middle.
4. The Microwave Positioning
Place the mug on the outer edge of the microwave turntable rather than the dead center. Most microwaves have a “cold spot” in the middle; placing the mug on the edge ensures more even heat distribution as it rotates.
5. The Pulse Bake
Microwave on high power for 70 to 90 seconds. (See the timing chart below for wattage adjustments). The cake will rise significantly during the last 20 seconds—this is normal.
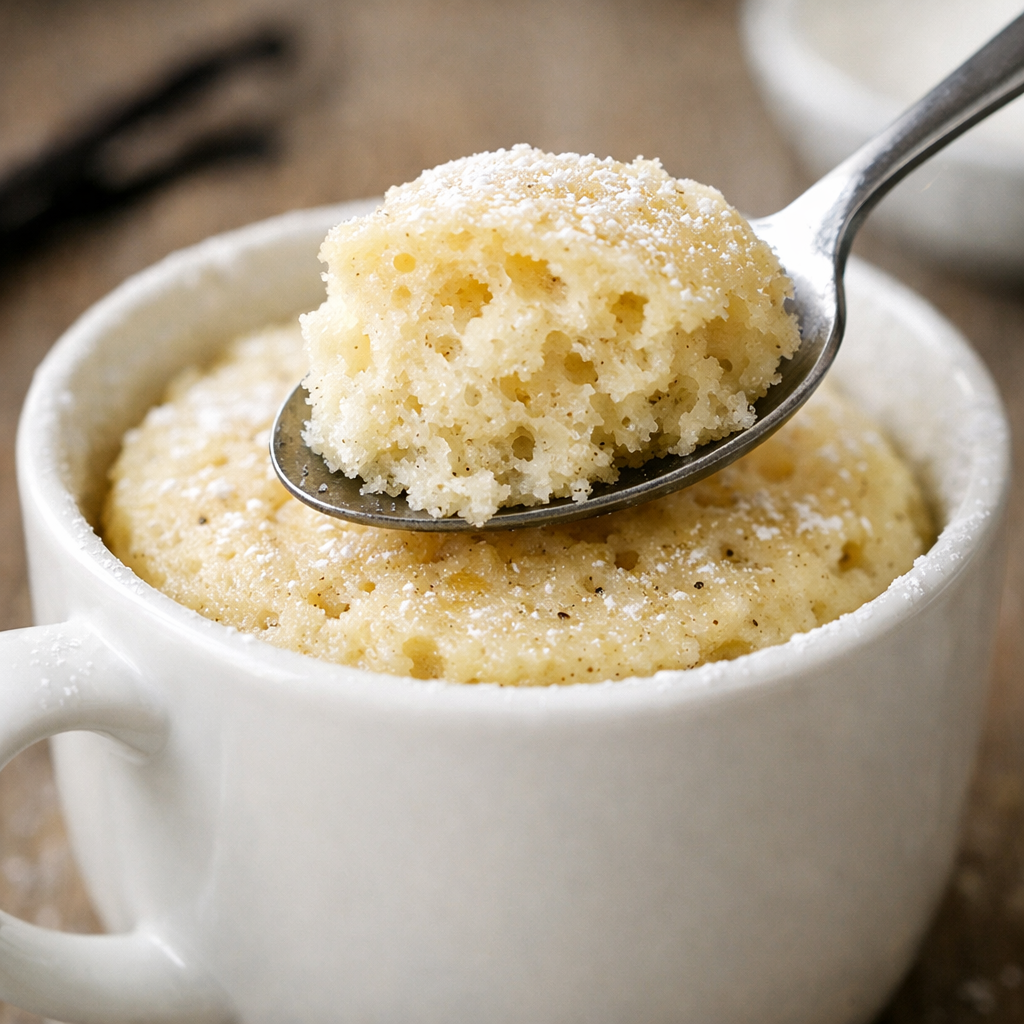
6. The Carry-Over Rest
This is the most critical step. Let the mug cake sit for at least 2 minutes. The center is still cooking via residual heat. If you eat it immediately, the texture will feel wet and undercooked; the rest allows the starches to set into a soft, cake-like structure.
Common Mistakes to Avoid
- Overmixing the Batter: Once you add the liquid, stir only until the flour disappears. Overworking the batter develops gluten, which—combined with microwave heat—leads to a tough, bready texture.
- Using an Egg: As mentioned, a whole egg is too much for a single mug. It will make the cake taste like a vanilla sponge-omelet. Stick to the butter-milk ratio for a true cake crumb.
- Overcooking: Even 10 extra seconds can turn a moist vanilla mug cake into a piece of leather. It is better to pull it out when the top looks slightly “damp” than to wait until it looks dry.
- Cold Milk with Melted Butter: If you pour cold milk into melted butter, the butter will clump into tiny wax-like beads. Use room-temperature milk for a smooth emulsion.
Timing & Doneness Indicators
Microwave wattages vary. Use this table to calibrate your vanilla mug cake recipe based on your appliance:
Serving Suggestions
A quick vanilla mug cake is a blank canvas. Elevate your 2-minute dessert with these professional finishing touches:
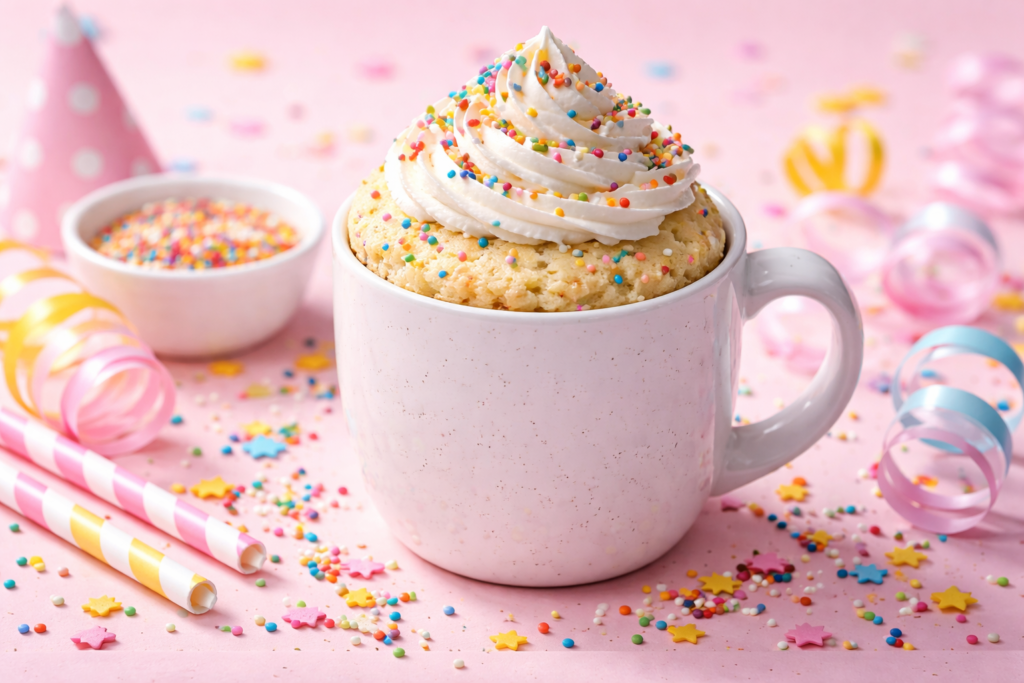
- The Birthday Style: Add a spoonful of vanilla frosting and extra rainbow sprinkles to the top while the cake is still warm.
- The Berry Blast: Serve with a handful of fresh blueberries or a dollop of whipped cream and macerated strawberries.
- The Glaze Drizzle: Mix 2 tbsp of powdered sugar with 1/2 tsp of milk to create a quick glaze. Pour it over the cake for a “donut-style” finish.
- The Salted Caramel: A drizzle of caramel sauce and a tiny pinch of flaky sea salt transforms this into a sophisticated dessert.
FAQ: Solving Your Mug Cake Frustrations
Q: Why is my mug cake so dry and hard? A: This is almost always caused by overcooking. Microwave cakes cook from the inside out. Even if the top looks a little bit wet, it is likely done. Remember that the cake continues to cook for 2 minutes after the microwave stops. Also, ensure you are using a full 1.5 tablespoons of butter or oil; fat is what prevents dryness.
Q: Can I make this vanilla mug cake recipe gluten-free? A: Yes. You can substitute the all-purpose flour with a 1-to-1 gluten-free flour blend. Avoid using pure almond or coconut flour as a direct swap, as they require different moisture ratios.
Q: My cake overflowed and made a mess! What happened? A: Your mug was either too small or you used too much baking powder. A standard 12-oz mug is perfect. Also, ensure you are using a level 1/2 teaspoon of baking powder—accuracy matters in such a small-scale recipe.
Q: Why does my mug cake taste “metallic”? A: This is usually due to using too much baking powder or using a brand that contains aluminum. Switch to an aluminum-free baking powder for a cleaner flavor profile.