The secret to great hibachi fried rice recipe isn’t found in a special brand of soy sauce or a high-end flat-top grill. It’s found in the texture.
We have all been there: you’re craving that smoky, buttery, slightly chewy rice you get at a Japanese steakhouse. You gather your ingredients, toss them in a pan, and ten minutes later, you’re staring at a bowl of mushy, steamed grains that taste more like a salt bomb than a delicacy. The “mush factor” is the single greatest hurdle for home cooks.
The truth is that hibachi rice is less about “cooking” and more about “searing.” It is a dish of high heat and controlled moisture. If you want to replicate that restaurant-quality bite, you have to stop treating rice like a side dish and start treating it like a protein that needs a crust.
Why This Recipe Works
This recipe succeeds because it prioritizes the physics of the grain. To get that signature hibachi finish, we focus on three pillars:
- Retrogradation: By using chilled, day-old rice, the starches have tightened and crystallized. This allows the grains to stay separate rather than clumping into a paste when they hit the hot fat.
- The Emulsion of Garlic Butter: Traditional stir-fry uses oil. Hibachi uses a combination of oil and salted butter. The milk solids in the butter caramelize against the rice, providing a nutty depth that soy sauce alone cannot achieve.
- High Surface Area: While a wok is great for tossing, a large cast-iron skillet or a flat-top griddle is actually better for hibachi. It mimics the expansive teppanyaki surface, allowing the rice to spread thin and develop a “bark.“
Ingredients & Measurements
Yields: 4 Servings
The Grain
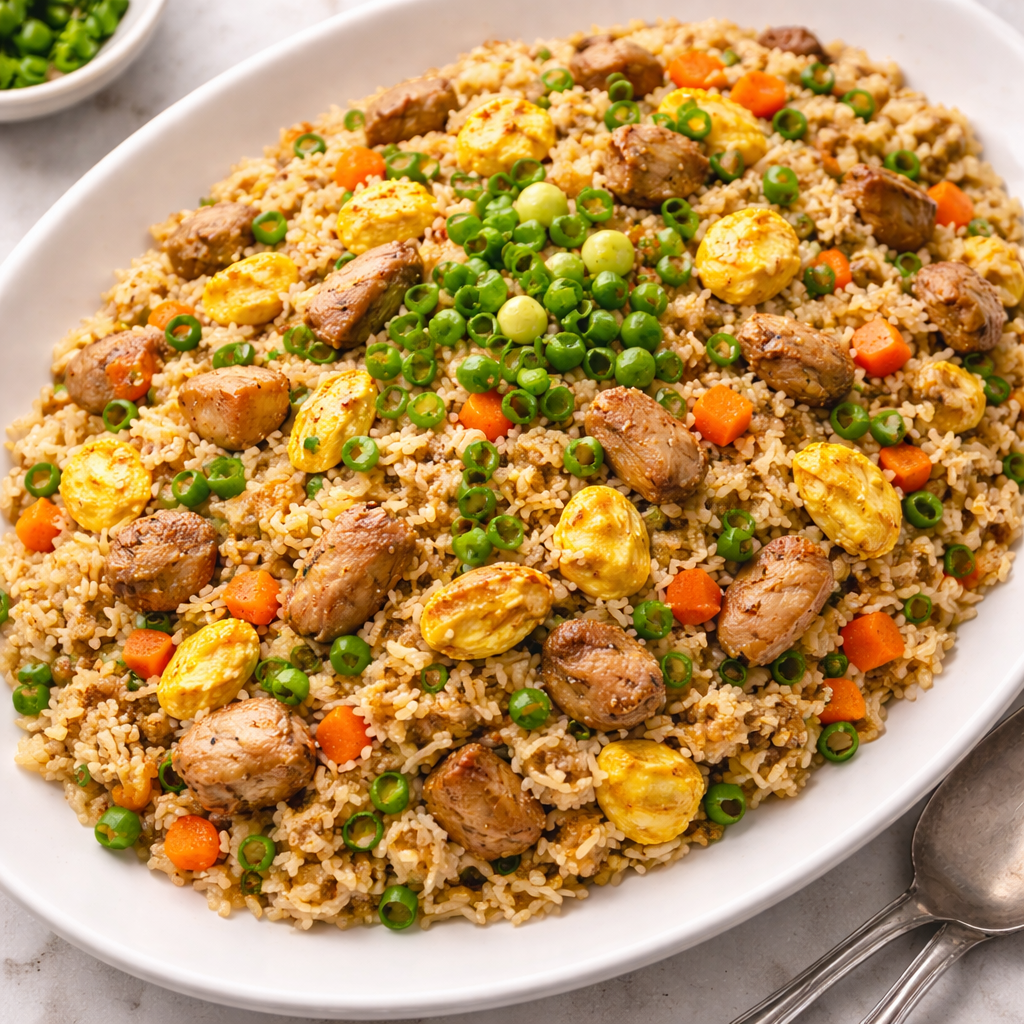
- 4 cups Cooked Jasmine or Medium-Grain Rice: Must be chilled for at least 12 hours. Jasmine is preferred for its floral aroma and sturdy structure.
- 2 tbsp Neutral Oil: Grapeseed or canola. You need a high smoke point to handle the initial sear.
The Flavor Base
- 4 tbsp Unsalted Butter: Divided. High-quality European butter provides better fat content.
- 4 cloves Garlic: Finely minced. Do not use the jarred variety; the phosphoric acid in the preservative ruins the delicate butter flavor.
- 1 Small White Onion: Finely diced. You want them small enough to soften quickly but large enough to provide a textural pop.
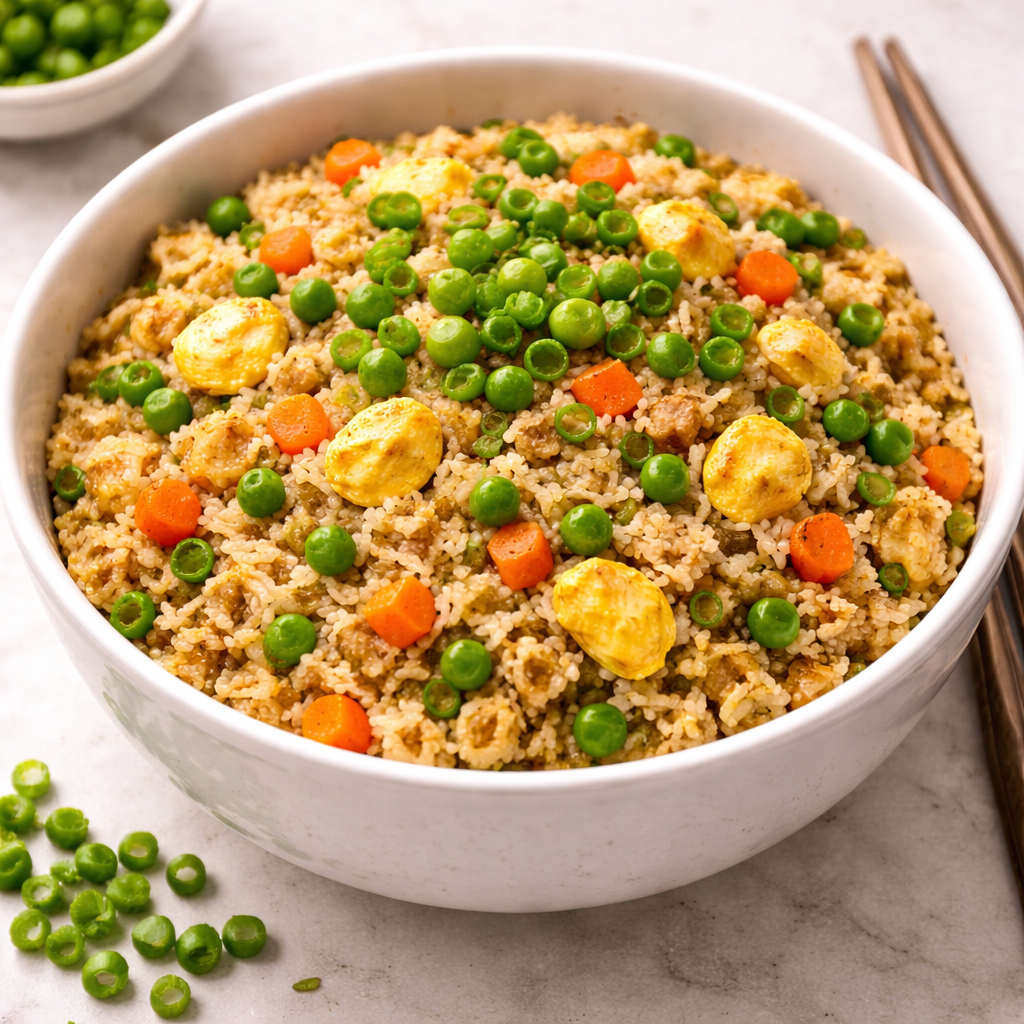
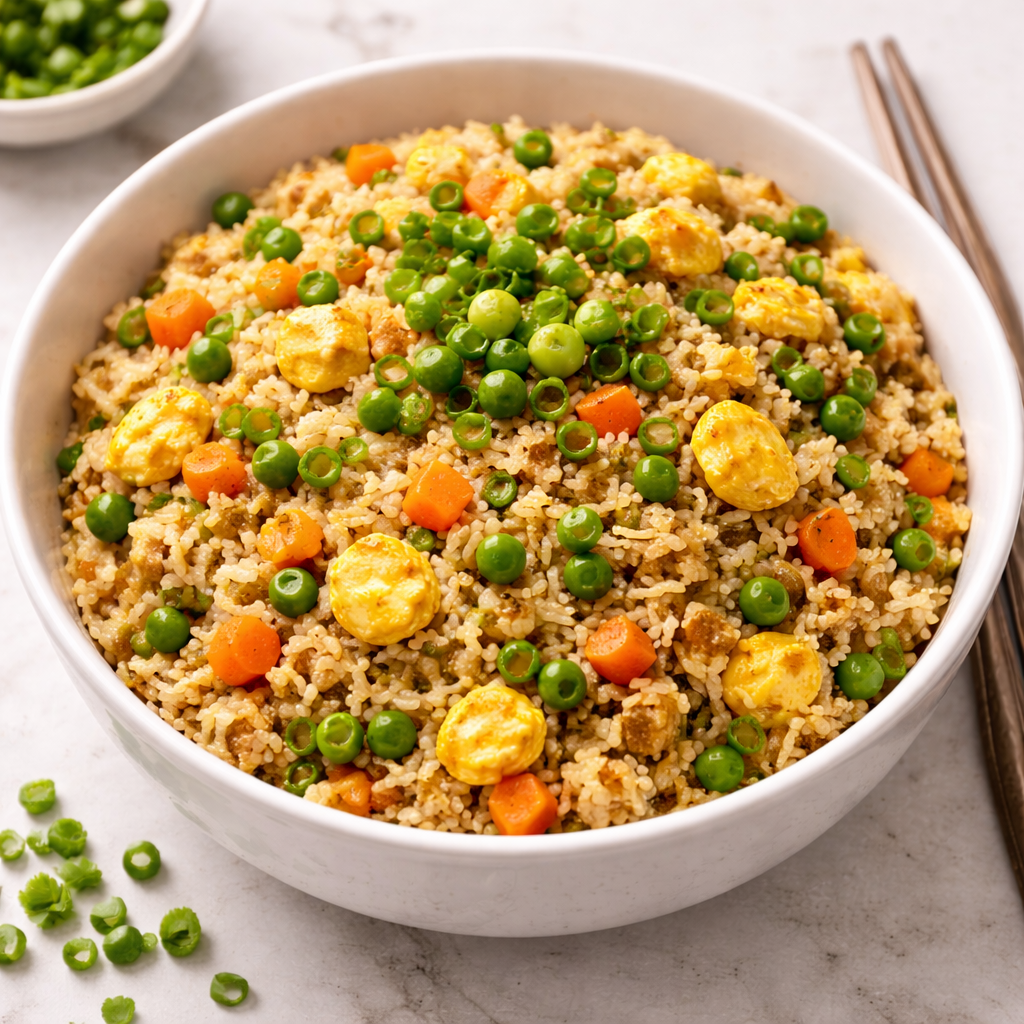
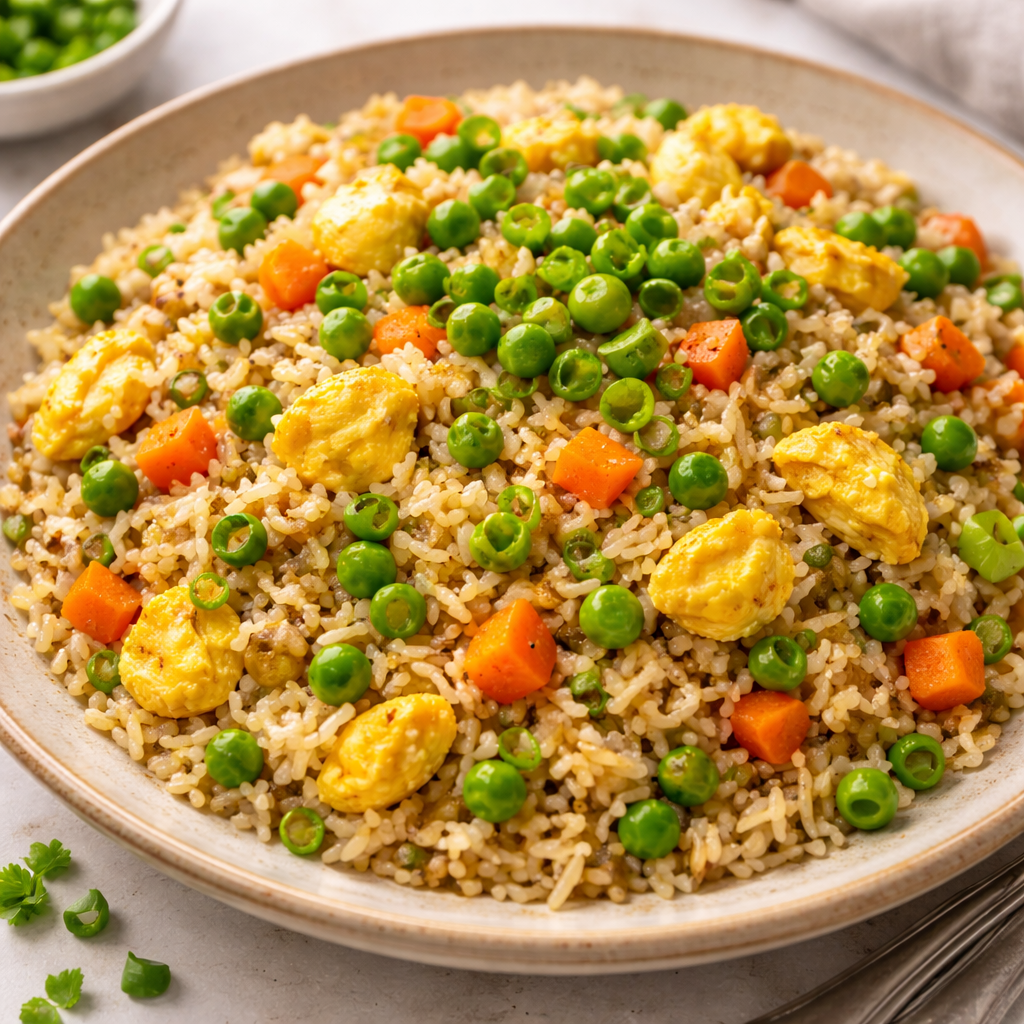
- 1/2 cup Carrots: Finely diced or shredded.
The Seasoning
- 3 tbsp Low-Sodium Soy Sauce: This allows you to control the salt levels precisely.
- 1 tsp Toasted Sesame Oil: Add this only at the very end to preserve its volatile aromatic compounds.
- 1/2 tsp Mirin: Provides a subtle sweetness that balances the salt.
- Salt and White Pepper: To taste. White pepper provides a floral heat without the visible black specks.
The Proteins & Garnish
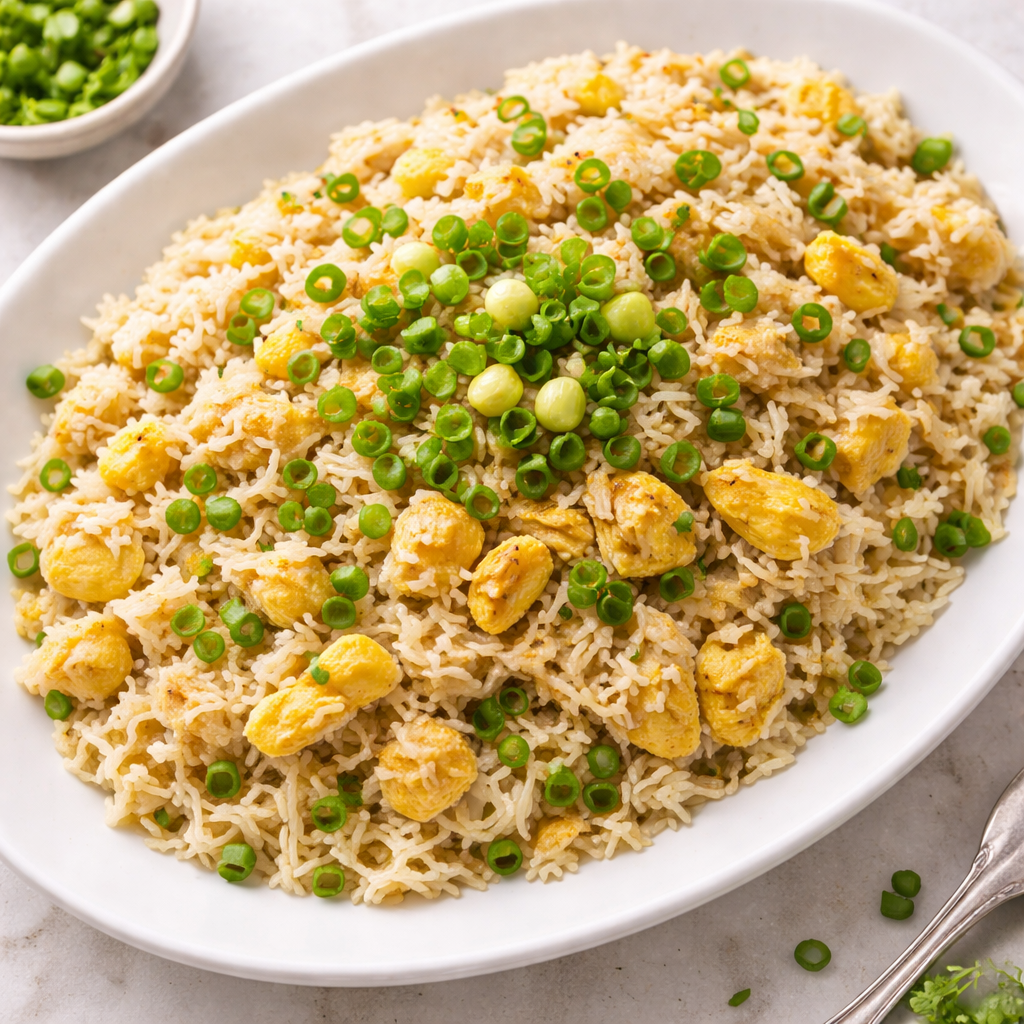
- 3 Large Eggs: Beaten.
- 1/4 cup Scallions: Thinly sliced on a bias.
- 1 tsp Toasted Sesame Seeds: For a nutty finish.
Step-by-Step Cooking Guid
1. The Prep (The “Mise en Place”)
Fried rice moves incredibly fast. Once the pan is hot, you won’t have time to chop an onion. Ensure your rice is broken up; reach into the bowl with cold, damp hands and break apart any large clumps so the grains are individual and free-flowing.
2. Searing the Aromatics
Set your largest skillet or griddle over medium-high heat. Add the neutral oil. Once the oil begins to shimmer (just before it smokes), drop in your onions and carrots.
Cook’s Note: We aren’t looking for deep caramelization on the onions yet. We want them translucent and “sweated.” This takes about 3–4 minutes.
3. The Garlic Butter Foundation
Clear a small space in the center of the pan. Drop in 2 tablespoons of butter and the minced garlic. Let the butter foam. As soon as the garlic becomes fragrant (about 30 seconds), toss it with the vegetables.
4. The Rice “Toast”
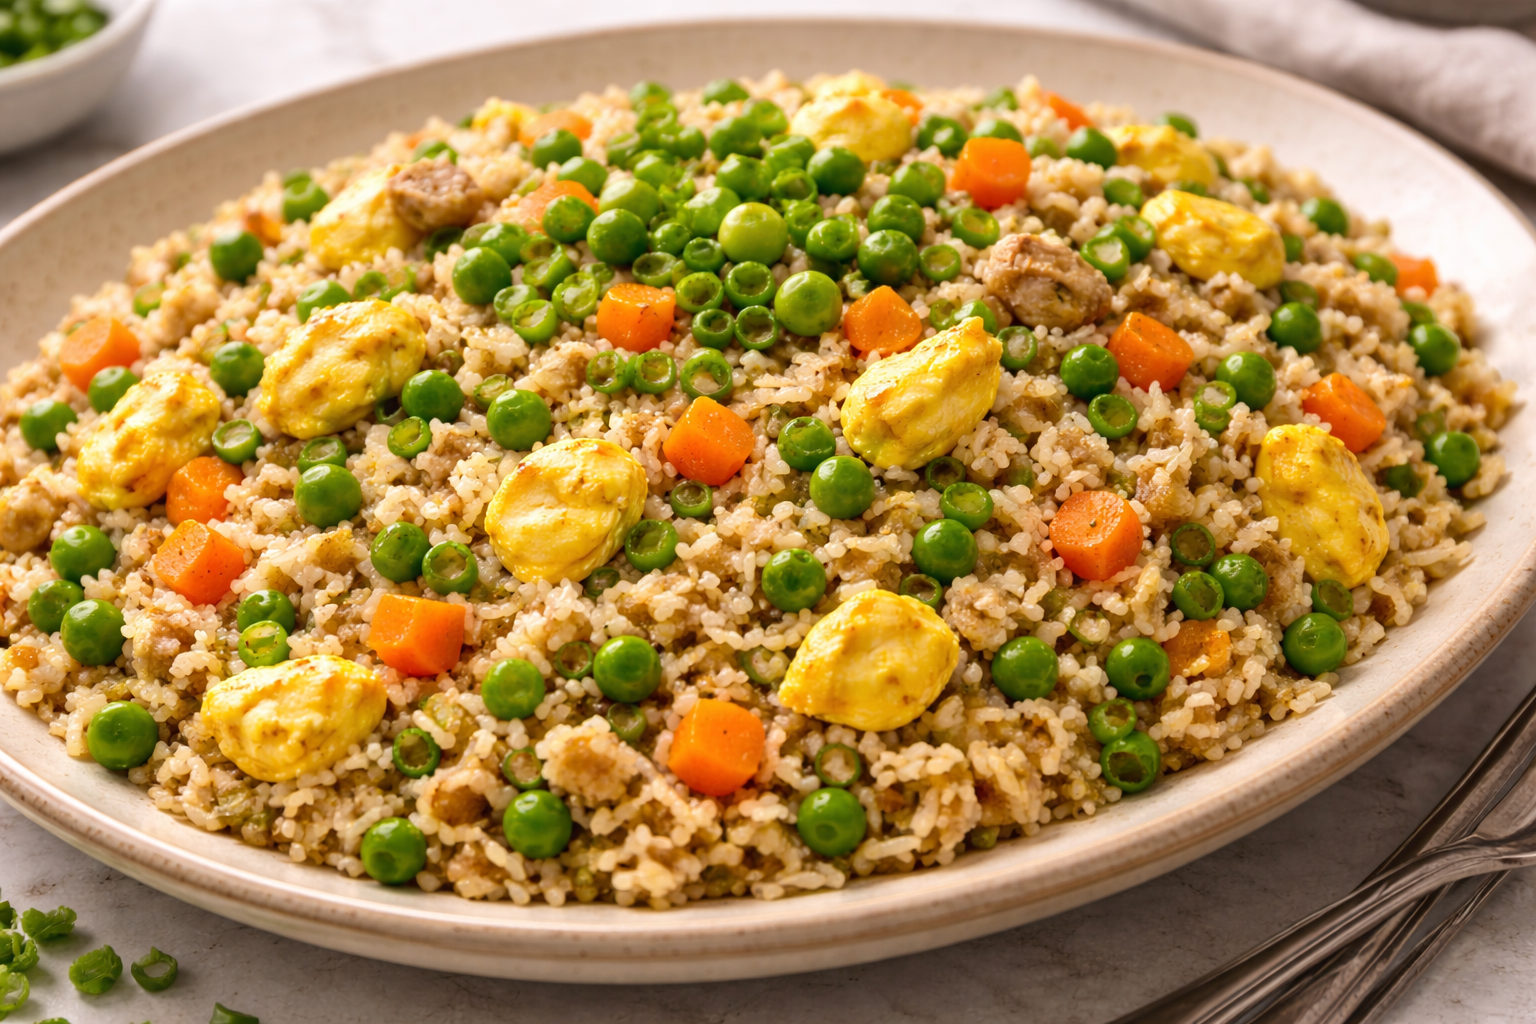
Turn the heat up to high. Add the rice to the pan. This is the most critical step. Spread the rice out into an even, thin layer covering the entire surface of the pan. Do not touch it. Let it sit for 2 full minutes. You want to hear it crackle. This is the sound of moisture leaving the grain and the starch beginning to fry.
5. The Egg Scramble
Push the rice and vegetable mixture to the outer edges of the pan, creating a “well” in the center. Pour the beaten eggs into the middle. Using a spatula, scramble them quickly until they are 80% cooked—still slightly wet but holding their shape. Incorporate the eggs into the rest of the rice.
6. Seasoning and Finishing
Drizzle the soy sauce and mirin over the rice. Add the remaining 2 tablespoons of butter. Use a folding motion to incorporate everything. The cold butter melting at the end creates a silky glaze that coats every grain.
Turn off the heat. Drizzle the toasted sesame oil and toss in the scallions. The residual heat will wilt the scallions just enough to release their oils without turning them into mush.
Common Mistakes to Avoid
Using Freshly Cooked Rice
Fresh rice is full of steam. If you put it into a hot pan with oil, that steam has nowhere to go but back into the grain, resulting in a sticky, porridge-like texture. If you’re in a rush, spread freshly cooked rice onto a baking sheet and put it in front of a fan for 20 minutes to dehydrate the surface.
Overcrowding the Pan
If you have a small skillet, cook in batches. If the layer of rice is more than an inch thick, the bottom will fry while the top steams. You want as much surface contact as possible.
Using Only Soy Sauce for Flavor
Many home cooks rely solely on soy sauce. This leads to rice that is dark brown and overly salty. The “steakhouse” flavor actually comes from the butter and the garlic. The soy sauce should be a background note, not the lead singer.
Timing & Doneness Indicators
- The Sizzle: If the pan is silent when you add the rice, it’s not hot enough. You should hear an immediate, aggressive hiss.
- The Bounce: When the rice is done, the grains should “jump” or dance slightly in the pan. This indicates they are light, dry, and coated in fat.
- Color: The rice should be a light golden tan, not a deep chocolate brown. If it’s too dark, you’ve overdone the soy sauce.
Serving Suggestions
Hibachi fried rice is a versatile canvas. To make it a full meal, consider these pairings:
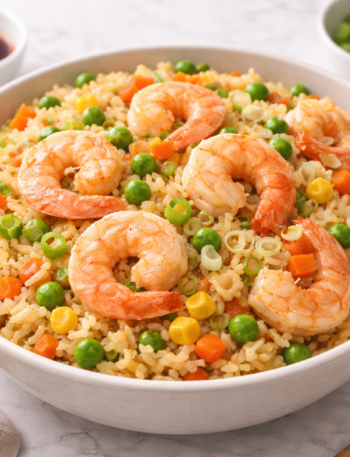
- The Protein: Top with seared shrimp, thinly sliced flank steak, or chicken thighs finished with a squeeze of lemon and a dash of soy.
- The Sauce: No hibachi experience is complete without Yum Yum Sauce (a mayo-based sauce with paprika, sugar, and garlic).
- The Side: Serve alongside grilled zucchini and onions seasoned with soy sauce and butter to mimic the full teppanyaki vegetable medley.
FAQ
Q: Can I use brown rice? A: You can, but the texture will be significantly different. Brown rice has an outer bran layer that prevents it from absorbing the butter and soy sauce in the same way. It will be much “nuttier” and chewier. If using brown rice, increase the butter by 1 tablespoon to compensate for the dryness.
Q: My rice is sticking to the bottom of the pan. What happened? A: This usually happens for two reasons: either the pan wasn’t hot enough when you added the oil, or you are using a non-seasoned stainless steel pan without enough fat. Ensure the “shimmer” is present in the oil before the rice hits the metal.
Q: Is it necessary to use MSG? A: While not strictly necessary, a tiny pinch of MSG (Monosodium Glutamate) is often the “hidden” ingredient in restaurant recipes. It provides that savory umami punch. If you’re avoiding it, the soy sauce and butter provide plenty of flavor on their own.
Q: Why does my rice taste bland even with soy sauce? A: You likely need a pinch of kosher salt or more garlic. Soy sauce provides saltiness, but it also adds a lot of liquid. If you add too much, you ruin the texture. Use a small amount of salt to boost the flavors without adding moisture.
Easy Chicken and Wild Rice Soup Recipe