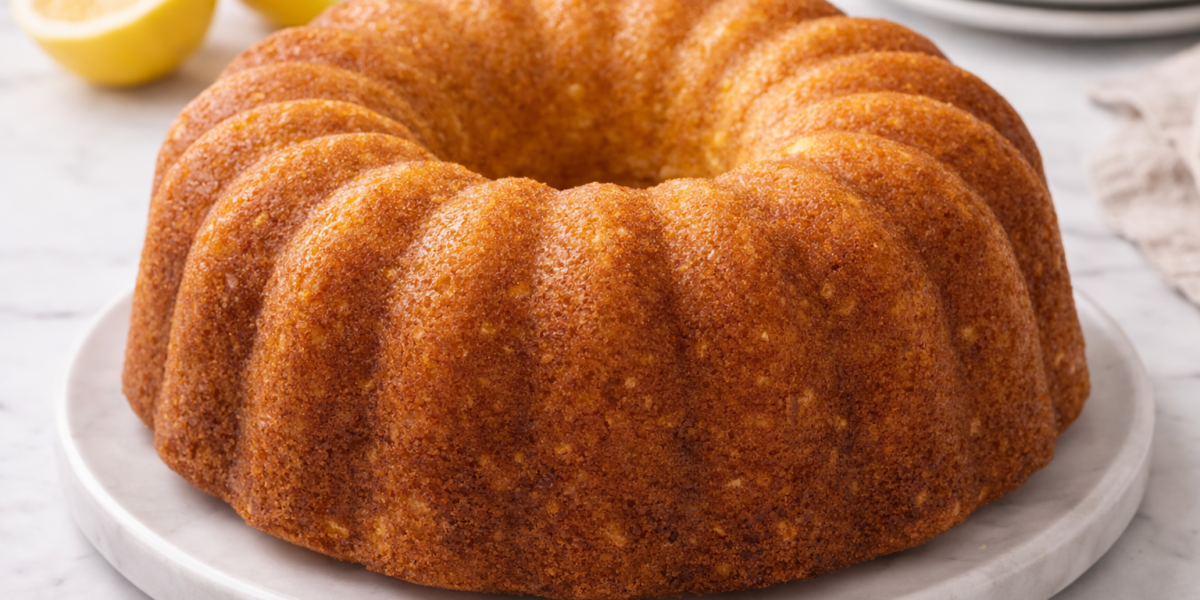
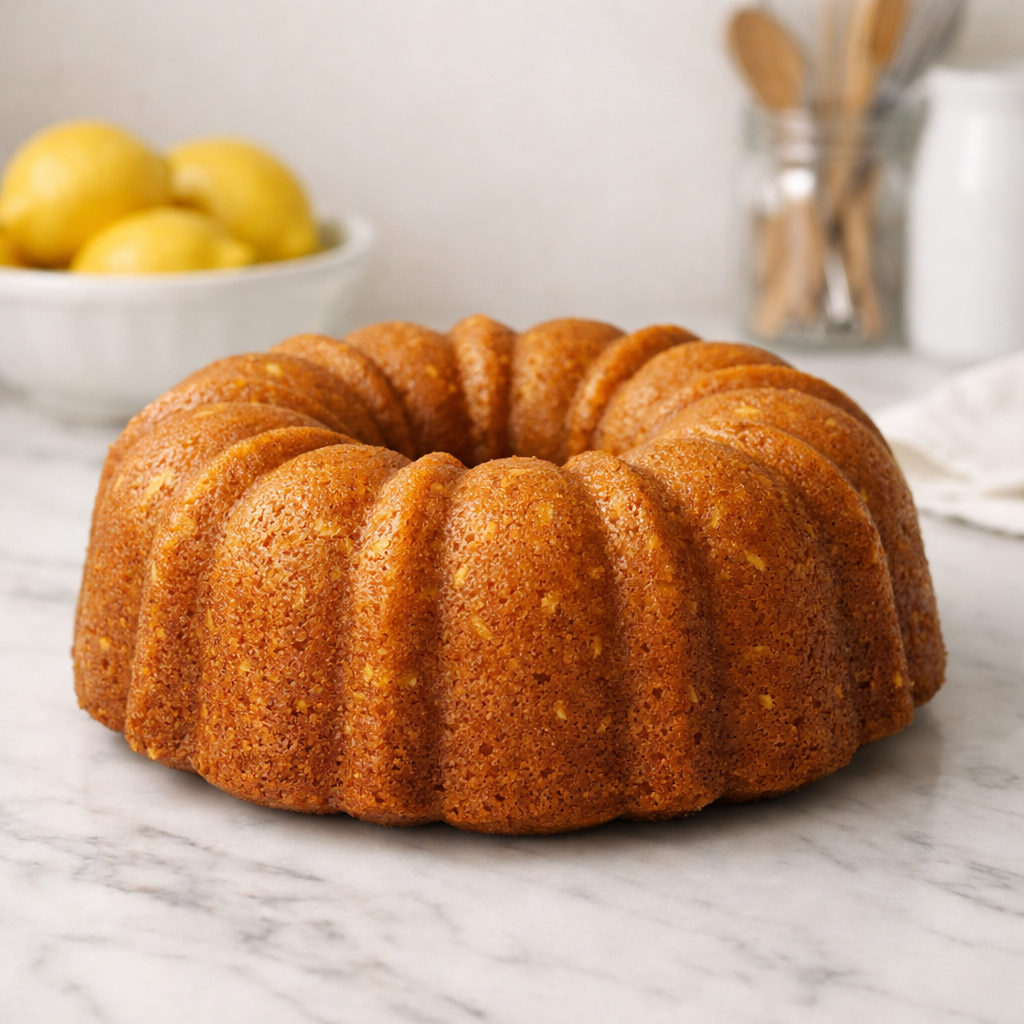
Lemon Bundt Cake Recipe The Bundt cake represents a specific architectural challenge in the world of pastry. Unlike a standard layer cake, which relies on frosting for moisture and structural masking, a Lemon Bundt cake is a singular, exposed entity. It must possess a crumb dense enough to support its own intricate geometry yet tender enough to dissolve on the palate. Achieving the perfect lemon-infused crumb requires a sophisticated understanding of fat emulsification, acid-base reactions, and the volatile nature of citrus oils.
This guide provides a rigorous technical framework for producing a professional-grade Lemon Bundt cake that balances high-tonality acidity with a rich, buttery foundation.
Recipe Overview
This formulation utilizes the creaming method supplemented by an acidified dairy component. By manipulating the structural properties of butter and sugar, we create a micro-cellular network of air pockets that expand during the bake, resulting in a lofty, velvety texture.
- Yield: One 10-12 cup capacity Bundt pan
- Active Preparation: 40 minutes
- Baking Duration: 55–65 minutes
- Core Technique: High-aeration creaming and post-bake syrup infusion.
Flavor Profile Analysis
A superior Lemon Bundt cake is characterized by a three-dimensional flavor profile:
- Top Notes (Volatile Citrus): The immediate sensory impact comes from the zest. Lemon zest contains essential oils (limonene) that provide a bright, floral aroma. By rubbing the zest into the granulated sugar before mixing, we utilize mechanical friction to rupture the zest’s oil sacs, “perfuming” the entire cake from the within.
- Mid Notes (Lactic Tartness): The use of buttermilk or full-fat sour cream provides a secondary layer of acidity. This is not a “sharp” sourness but a rounded, cultured tang that bridges the gap between the bright lemon and the rich fats.
- Base Notes (Maillard and Butter): The exterior of a Bundt cake, due to its prolonged contact with the metal pan, undergoes significant Maillard browning. This provides a subtle toasted-sugar undertone that prevents the lemon from becoming one-dimensional or “candy-like.”
Ingredient Ratios Explained
In professional patisserie, ingredients are measured by weight (grams) to ensure the precise ratios required for structural success.
The Structural Ratio
The formula follows a modified Pound Cake ratio (1:1:1:1) but adjusts for the inclusion of liquid lemon juice and acidified dairy.
- Cake Flour (375g): We prioritize cake flour over all-purpose for its lower protein content (approx. 6–8%). This ensures minimal gluten development, yielding a “short” crumb that is tender rather than chewy.
- Granulated Sugar (400g): Sugar is not merely a sweetener; it is a tenderizer and a hygroscopic agent that retains moisture.
- Unsalted European-Style Butter (225g): We specify European-style butter (82%+ butterfat) because the lower water content ensures a more stable emulsion during the creaming process.
- Large Eggs (250g/approx. 5 eggs): Eggs provide the protein structure that “sets” the cake. At room temperature, they emulsify more easily into the fat.
The Leavening Equilibrium
We utilize a dual-leavening system:
- Baking Powder (2 tsp): Provides the bulk of the lift through carbon dioxide release.
- Baking Soda (1/2 tsp): Specifically included to react with the acidity of the lemon juice and buttermilk, neutralizing excess acid while contributing to a finer crumb and better browning.
Precise Cooking Method
1. The Citrus-Sugar Abrasion
In the bowl of a stand mixer, combine the 400g sugar and the zest of 4 large lemons. Use your fingertips to rub the zest into the sugar until it becomes moist and highly aromatic. This step is non-negotiable for professional-grade flavor extraction.
2. The Creaming Phase
Add the 225g softened butter to the citrus sugar. Using the paddle attachment, cream on medium-high speed for a minimum of 5 minutes. The mixture should transition from a yellow, gritty paste to a pale, almost white, voluminous foam. You are physically carving air pockets into the fat; skimping on this step results in a heavy, “greasy” cake.
3. Emulsifying the Eggs
Incorporate the eggs one at a time, beating for 30 seconds after each addition. If the batter appears curdled or “broken,” add a tablespoon of your weighed flour to re-bind the emulsion.
4. Alternating Additions
Whisk the dry ingredients (flour, leaveners, salt) in one bowl. In another, whisk the 180ml buttermilk, 60ml lemon juice, and 2 tsp vanilla extract. With the mixer on low, add 1/3 of the dry ingredients, followed by 1/2 of the wet. Repeat, ending with the dry. Mixing only until the last streak of flour disappears prevents the over-development of gluten.
5. Pan Preparation
The geometry of a Bundt pan makes it prone to sticking. Use a “paste” of melted butter and flour (or a professional-grade baking spray with flour included). Brush it into every crevice using a pastry brush.
Heat & Timing Control
The Bundt pan’s central chimney is designed to conduct heat into the center of the cake, but the density of the batter requires a moderate oven.
- Oven Calibration: Preheat to 165°C (325°F). A lower temperature than the standard 175°C (350°F) is necessary for the cake to rise evenly without the edges drying out before the center is cooked.
- Placement: Place on the center rack. Avoid convection (fan) settings if possible, as the forced air can cause the “crust” to set too quickly, leading to a restricted rise.
- The Inversion Window: Once removed from the oven, let the cake rest in the pan for exactly 10 minutes. This allows the internal steam to slightly loosen the cake from the pan walls. If you wait longer, the sugar in the crust will begin to solidify, “gluing” the cake to the metal.

Professional Tips
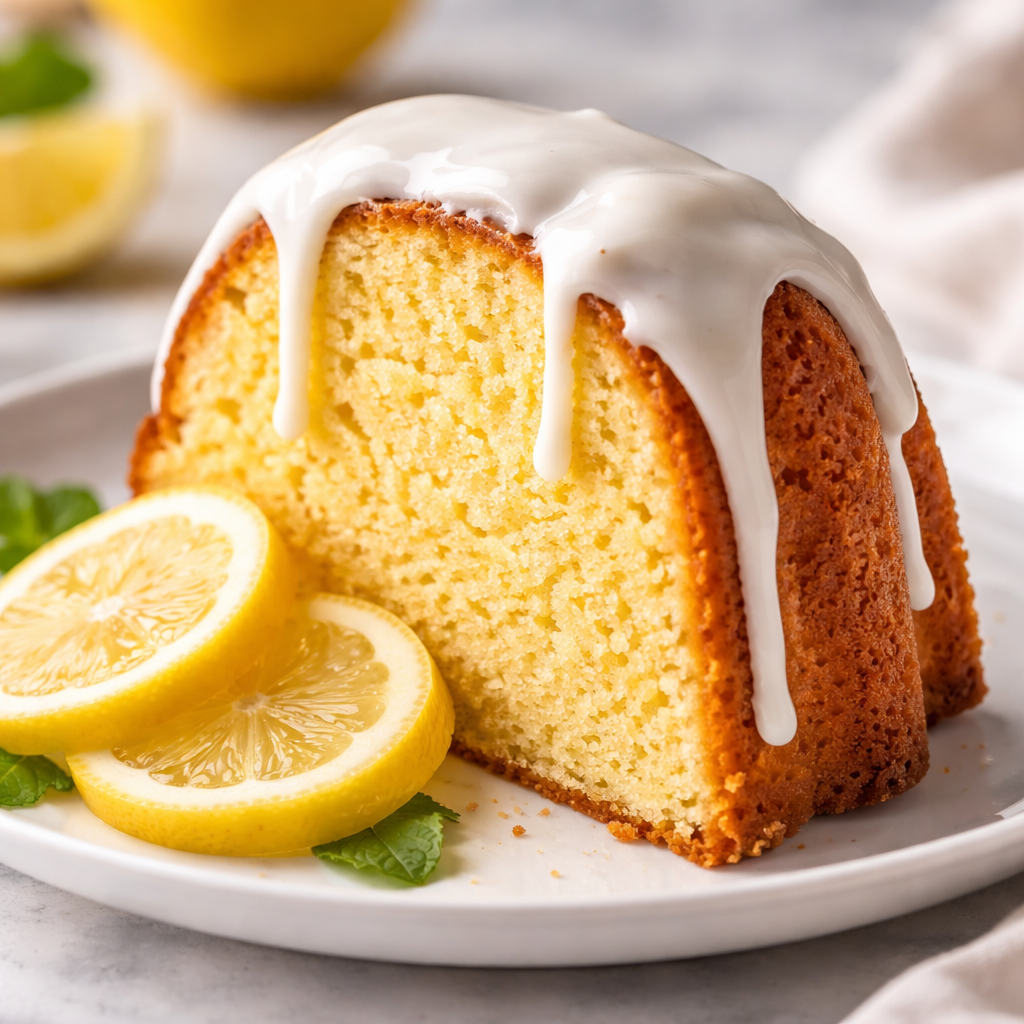
- The Syrup Infusion (The Secret to Longevity): While the cake is in its 10-minute resting phase, simmer 50g sugar and 50ml lemon juice until dissolved. Once you invert the cake onto a cooling rack, brush this hot syrup over the warm cake. This creates a moisture barrier and intensifies the tartness.
- Temperature of Ingredients: Every cold ingredient (eggs, buttermilk, butter) must be at 21°C (70°F). Cold eggs will seize the creamed butter, destroying the aeration you worked to achieve.
- Sifting for Aeration: Sift the cake flour twice—once before measuring and once with the leaveners. This ensures a uniform distribution of baking powder and prevents “tunnels” in the crumb.
Customization Techniques
- The Floral Twist: Substitute 1 tsp of vanilla for 1/2 tsp of Lavender extract or finely culinary lavender buds. Lemon and lavender share the terpene linalool, making them molecularly compatible.
- The Poppy Seed Variation: Add 30g of blue poppy seeds to the dry ingredients. This provides a nostalgic crunch and a visual contrast to the yellow crumb.
- The Earl Grey Infusion: Steep two Earl Grey tea bags in the buttermilk while it warms to room temperature. The bergamot in the tea will amplify the lemon notes while adding a sophisticated herbal depth.
Storage & Reheating
- Room Temperature: Due to the high sugar content and the syrup glaze, this cake remains exceptionally moist for up to 4 days when stored under a glass cloche.
- Freezing: This is an ideal candidate for freezing. Wrap the unglazed cake tightly in plastic wrap and then foil. It will retain its structural integrity for up to 3 months. Thaw at room temperature for 6 hours before glazing and serving.
- Reheating: If a slice has dried slightly, a 10-second burst in a microwave or 5 minutes in a 120°C (250°F) oven will reactivate the fats, returning the crumb to its original softness.
FAQ
Q: Why did my cake “weep” or feel damp on the outside the next day? A: This is usually a result of “sweating.” If you wrap the cake while it is even slightly warm, the trapped steam condenses on the surface. Ensure the cake is completely cool to the touch before covering.
Q: Can I use Meyer Lemons? A: Yes, but Meyer lemons are a cross between a lemon and a mandarin orange. They are less acidic and sweeter. If using Meyer lemons, reduce the sugar in the batter by 25g and increase the lemon juice by 1 tablespoon to compensate for the lower acidity.
Q: My Bundt cake always has a large crack on the “bottom” (which is the top in the oven). Is this a failure? A: Not at all. A crack in a dense cake like a Bundt is an indicator of a strong rise. Because the pan is open at the top, the batter expands upward. To manage this, you can run a knife through the center of the batter before baking to “direct” the crack.
Q: Why is my cake crumbly rather than velvety? A: Over-baking is the primary culprit. Check the cake 5 minutes before the timer expires. Furthermore, ensure you are using Cake Flour; the higher protein in All-Purpose flour can sometimes lead to a tougher, more brittle structure if over-mixed.