The biggest frustration with Chicken Parmesan Pasta recipe isn’t the flavor—it’s the physics. We’ve all been there: you spend forty minutes breading and frying chicken to golden perfection, only to nestle it atop a bed of pasta where the steam from the sauce immediately turns that hard-won crust into a soggy, dampened mess. Or worse, the chicken is dry, the pasta is overcooked, and the sauce feels like an afterthought poured from a jar.
Great cooking is often about managing moisture and heat. To make a truly professional-grade Chicken Parmesan Pasta, you have to treat the chicken and the pasta as two distinct stars that happen to share a stage. This isn’t just a “one-pot” shortcut that compromises texture; it’s a refined method that ensures every bite has a crunch, every strand of pasta is coated in a velvety pomodoro, and the cheese pulls are nothing short of cinematic.
Why This Recipe Works
This version succeeds because it respects the Maillard reaction and the importance of starch emulsification.
- The Double-Dredge Defense: By using a specific ratio of Panko breadcrumbs and finely grated Parmesan, we create a structural barrier. The cheese melts slightly into the breadcrumbs during frying, creating a “lattice” that stays crisp longer, even when sitting near a sauce.
- The Sauce-Pasta Marriage: We don’t just dump sauce on noodles. We finish the pasta in the sauce with a splash of starchy pasta water. This creates an emulsion, ensuring the sauce clings to the pasta rather than pooling at the bottom of the bowl.
- Temperature Control: We use a shallow-fry method for the chicken to ensure the interior stays succulent while the exterior carbonizes just enough to provide that nutty, toasted flavor profile.
Ingredients & Measurements
Yields: 4 Generous Servings
The Chicken
- Chicken Breasts: 2 large (approx. 1 lb), halved horizontally into 4 thin cutlets.
- Flour: ½ cup all-purpose, seasoned with salt and black pepper.
- Eggs: 2 large, beaten with a teaspoon of water.
- Panko Breadcrumbs: 1 cup (Japanese-style crumbs provide superior surface area for crunch).
- Parmesan Cheese: ½ cup, finely grated (the “dusty” kind works best here for even coverage).
- Dried Oregano & Garlic Powder: 1 tsp each, mixed into the breadcrumbs.
- Oil: ½ cup neutral oil (Grapeseed or Avocado) for shallow frying.
The Pasta & Sauce
- Pasta: 12 oz Rigatoni or Penne (ridges are essential for “holding” the sauce).
- Olive Oil: 2 tbsp high-quality extra virgin.
- Garlic: 4 cloves, thinly sliced (not minced, to avoid burning).
- Crushed Tomatoes: 28 oz can (San Marzano variety is preferred for low acidity).
- Fresh Basil: 1 large bunch, torn by hand.
- Red Pepper Flakes: A pinch for “back-of-the-throat” heat.
- Fresh Mozzarella: 8 oz, torn into chunks or sliced.
Step-by-Step Cooking Guide
1. The Prep: Engineering the Cutlet
The secret to even cooking is uniform thickness. Place your chicken cutlets between two sheets of plastic wrap and use a meat mallet or a heavy skillet to pound them to an even ½-inch thickness. This ensures the chicken cooks through at the exact moment the breading reaches peak golden-brown.
2. The Breading Station
Set up three shallow bowls:
- Flour: Seasoned heavily. This is your primer.
- Egg Wash: Your glue.
- The Crust: Combine Panko, grated Parmesan, and dried herbs.
Pro Tip: Use the “wet hand, dry hand” method. Use one hand for the flour and breadcrumbs, and the other for the egg wash. This prevents your fingers from becoming “breaded” themselves.
3. The Sauce Foundation
While the chicken rests (letting the breading “set” for 5 minutes prevents it from falling off in the pan), start your sauce. In a wide skillet, heat olive oil over medium-low. Add the sliced garlic.
Cooking Science: We start garlic in cold oil to infuse the fat gently. If you drop garlic into screaming hot oil, the outside burns before the flavor permeates the oil.
Once the garlic is pale gold, add the crushed tomatoes and a pinch of salt. Simmer on low while you handle the chicken.
4. The Sizzle
Heat your frying oil in a separate heavy-bottomed skillet over medium-high. You’ll know it’s ready when a single breadcrumb sizzles instantly upon contact. Lay the chicken in, moving away from you to avoid splashes. Fry for 3–4 minutes per side.
Once golden, move the chicken to a wire rack—not a paper towel. A paper towel traps steam under the chicken, which leads to a soggy bottom. A wire rack allows air to circulate.
5. Finishing the Pasta
Boil your pasta in highly salted water (it should taste like the sea). Aim for 2 minutes under the package directions for “al dente.”
Before draining, reserve 1 cup of the cloudy pasta water. Add the drained pasta directly into your simmering tomato sauce. Add half a cup of that pasta water and toss vigorously. The starch in the water acts as a bridge between the watery sauce and the oily pasta, creating a silky, unified coating.
Common Mistakes to Avoid
- Crowding the Pan: If you put all four chicken cutlets in the skillet at once, the oil temperature will drop. Instead of frying, the chicken will “boil” in oil, resulting in a greasy, limp crust. Cook in batches.
- Rinsing the Pasta: Never rinse your pasta. You lose the starch needed to bind the sauce.
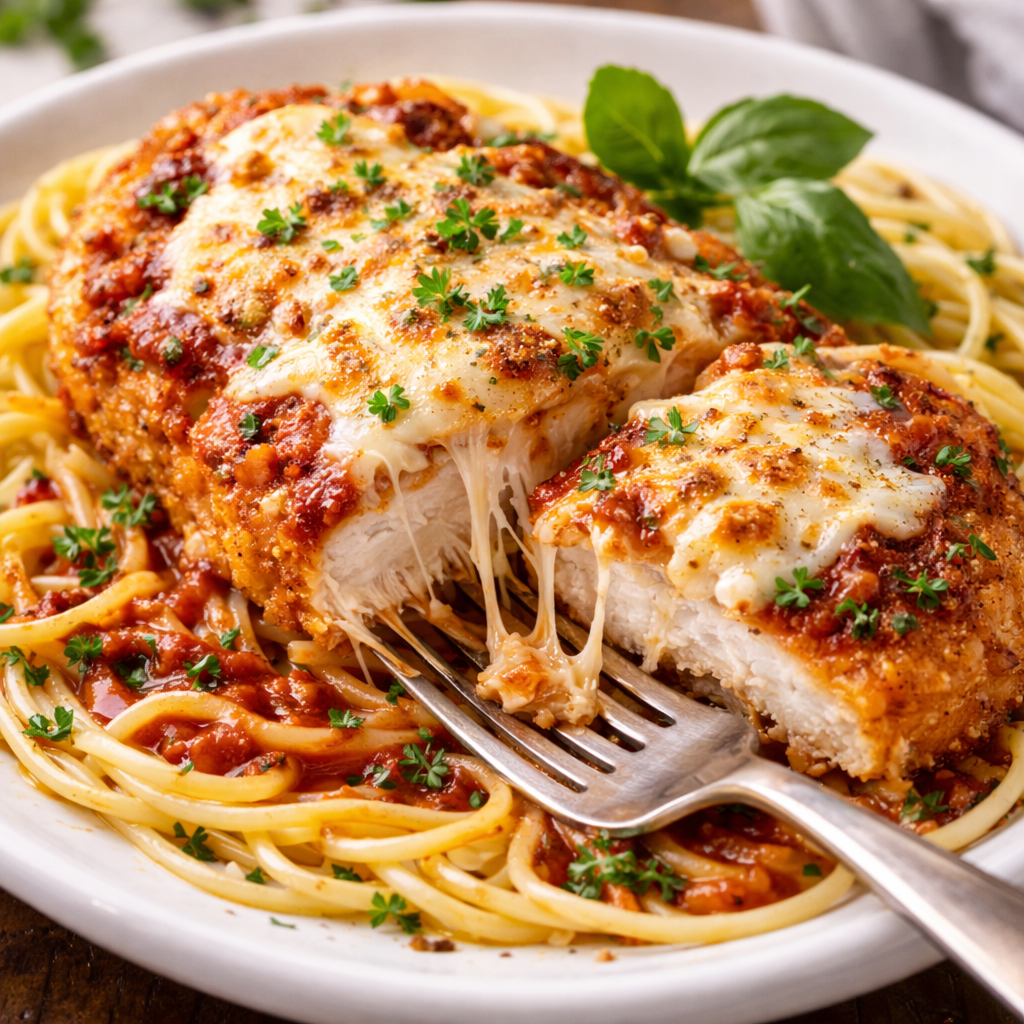
- Using Pre-Shredded Mozzarella: Bags of shredded cheese are coated in potato starch or cellulose to prevent clumping. This prevents a smooth melt. Always buy a ball of fresh mozzarella and tear it yourself.
Timing & Doneness Indicators
- The Chicken: Look for an internal temperature of 165°F (74°C). However, if you’ve pounded them thin, the visual cue of a deep golden-brown crust usually coincides perfectly with a juicy interior.
- The Sauce: It should be reduced until it’s thick enough that dragging a wooden spoon across the bottom leaves a trail that fills in slowly.
- The Pasta: It should have a “bite” (al dente). It will continue to soften slightly as it sits in the hot sauce.
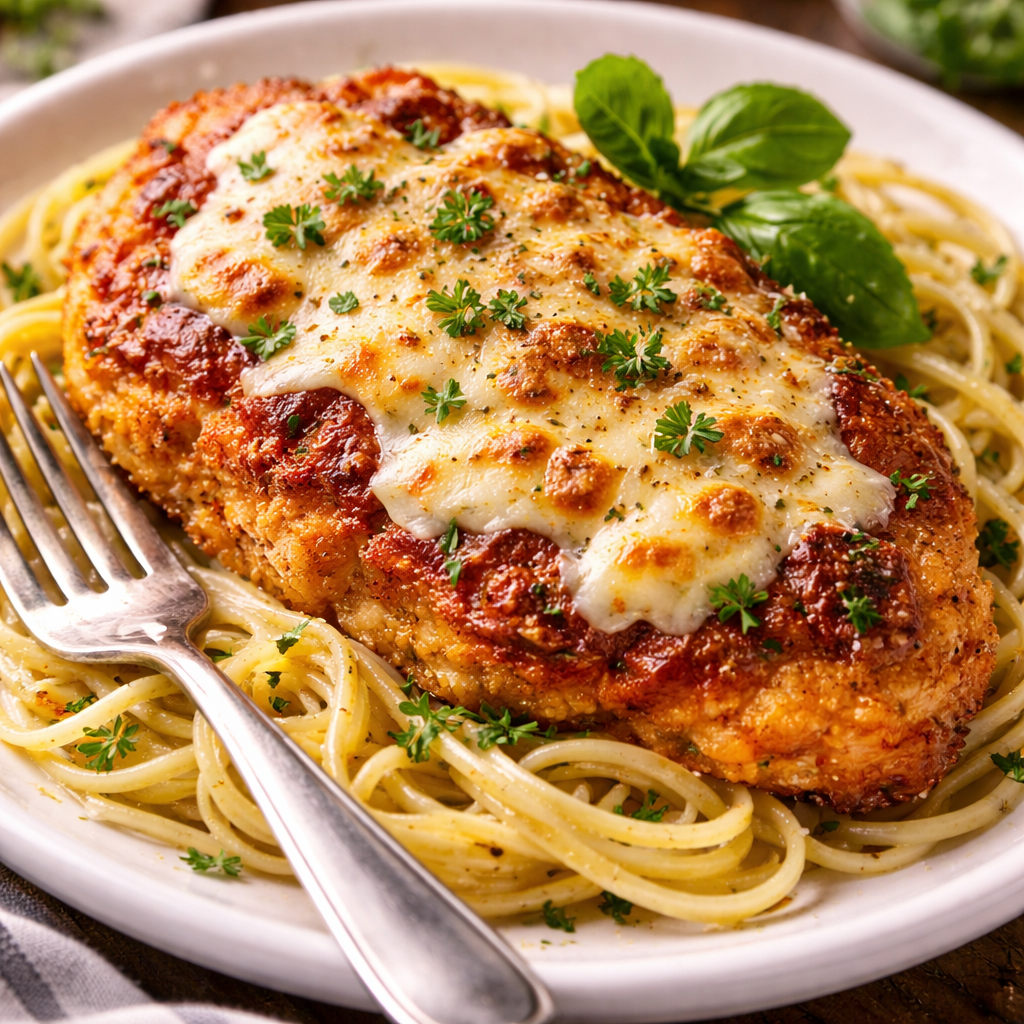
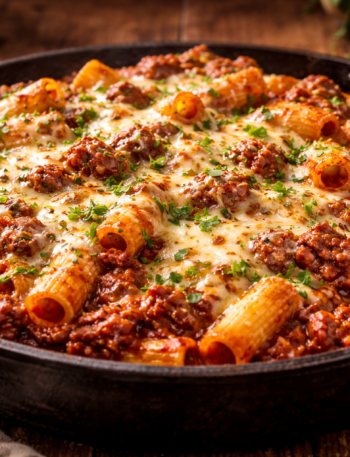
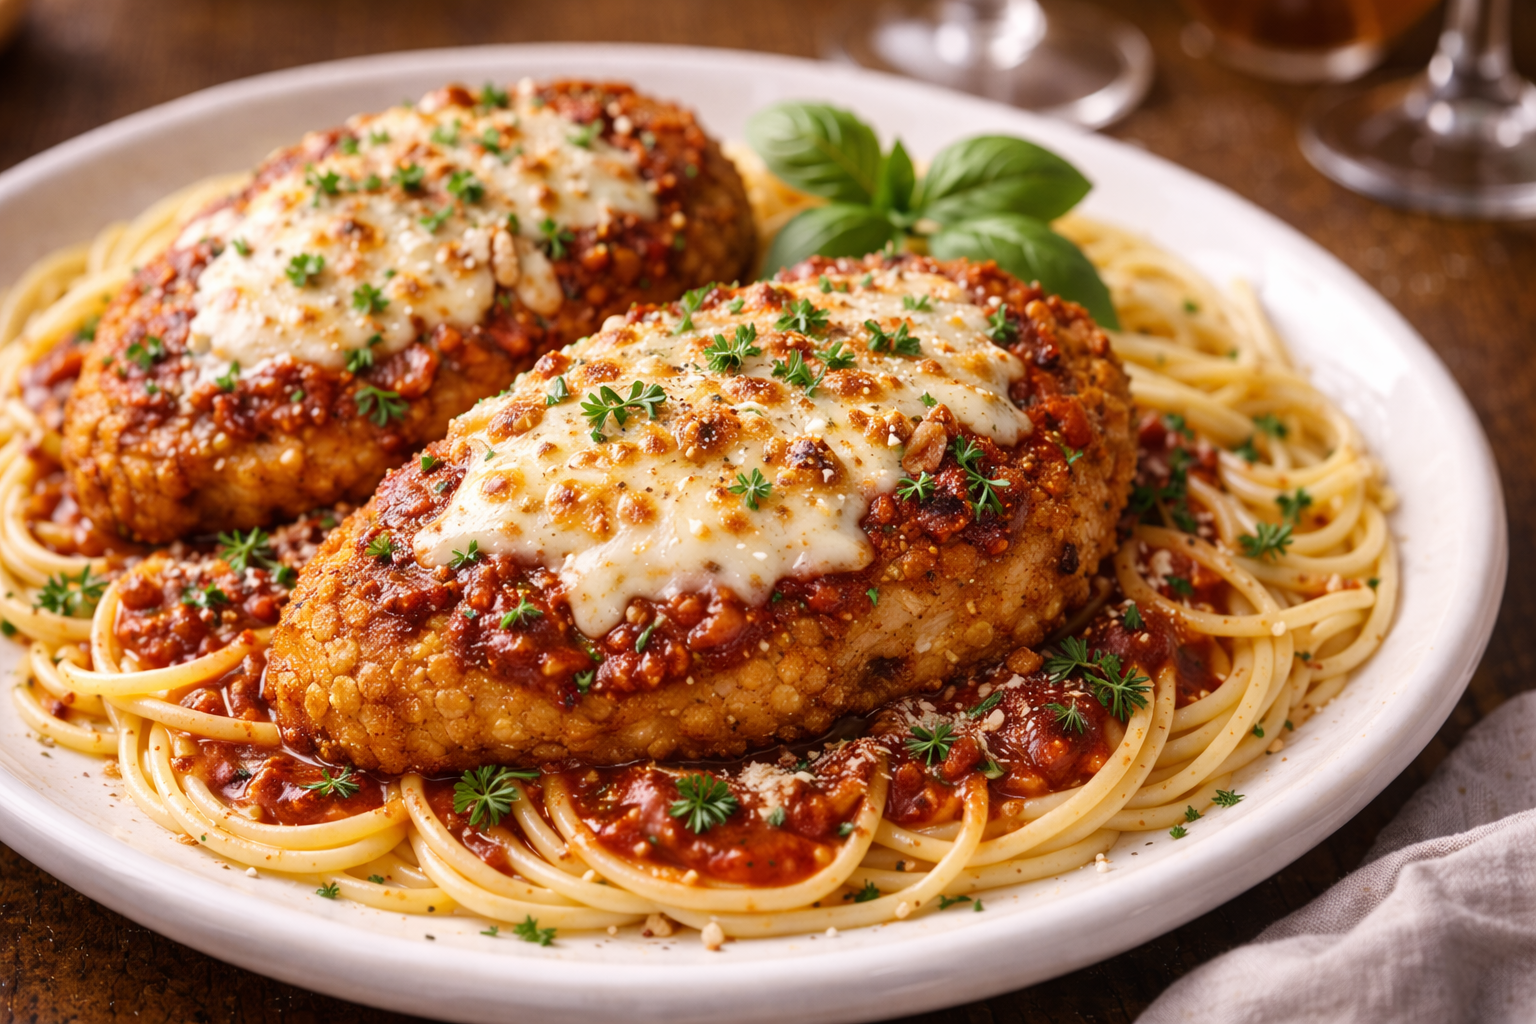
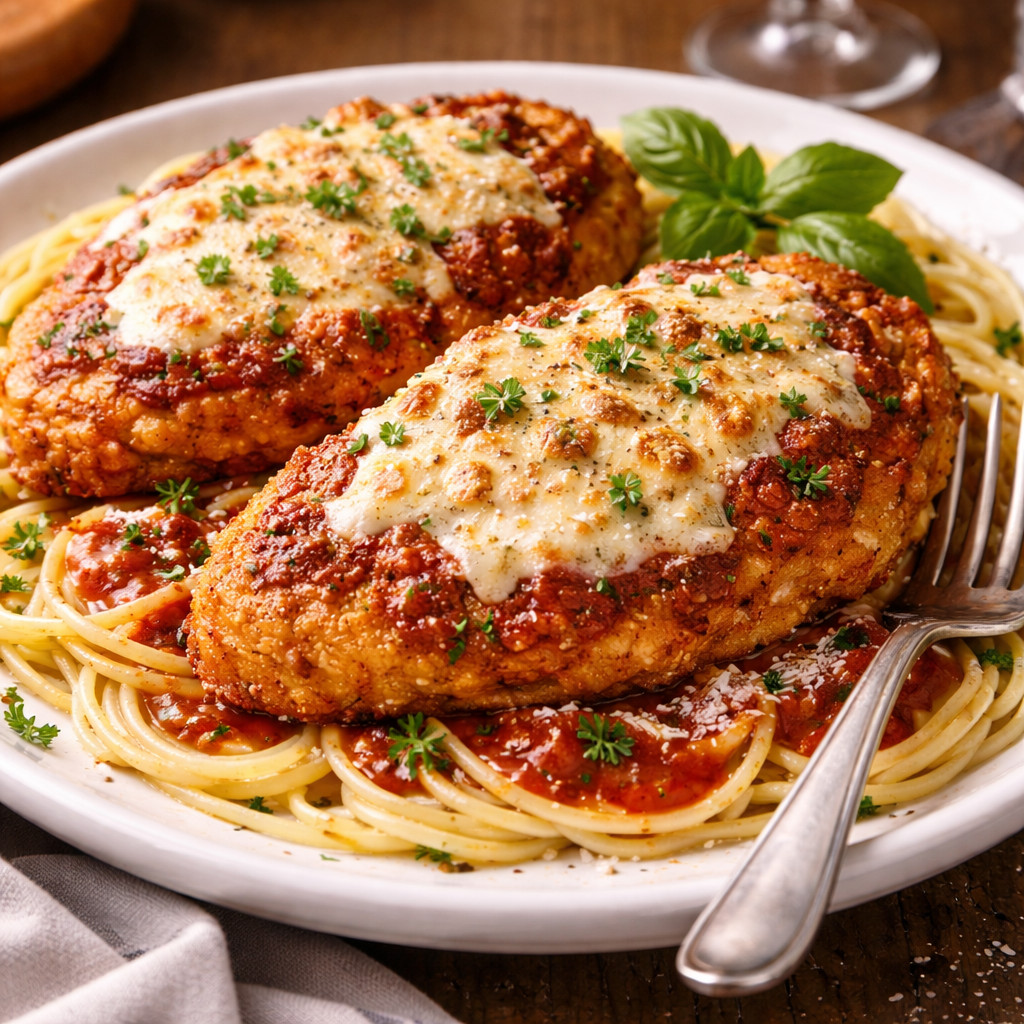
Serving Suggestions: The “Assembly”
To serve like a pro, swirl a generous portion of pasta into a wide bowl. Place the crispy chicken cutlet on top—do not submerge it.
Top the chicken with a slice of mozzarella and a spoonful of sauce, then briefly place under a broiler for 60 seconds until the cheese bubbles. Finish with a shower of fresh basil and a drizzle of extra virgin olive oil.
Pairing: A crisp, acidic Italian white like a Vermentino or a light-bodied Chianti cuts through the richness of the fried breading and cheese perfectly.
FAQ
Q: Why does my breading always fall off the chicken? A: This usually happens for two reasons: the chicken was wet before you floured it, or you didn’t let the breaded chicken “rest” before frying. Pat the meat bone-dry with paper towels first. Letting it sit for 5 minutes after breading allows the flour to hydrate and bond to the proteins.
Q: Can I bake the chicken instead of frying? A: You can, but you lose the specific texture of Chicken Parm. If you must bake, toast your Panko breadcrumbs in a dry pan with a little oil before breading the chicken. This ensures a golden color and crunch that the oven alone can’t provide.
Q: How do I reheat leftovers without the chicken getting rubbery? A: Avoid the microwave. Place the chicken on a toaster oven rack at 350°F to re-crisp. Heat the pasta separately in a small pan with a splash of water to loosen the sauce.