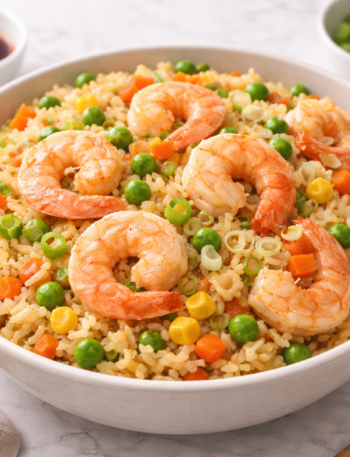
Crispy Rice Recipe In the modern culinary landscape, the crispy rice recipe has evolved from a humble technique for using leftovers into a high-end gastronomic centerpiece. Whether you are aiming for the golden, shattered-glass crust of Persian Tahdig, the savory depth of Korean Nurungji, or the trendy, snackable squares of “Crispy Rice with Spicy Tuna,” the objective remains the same: the perfect dehydration and subsequent frying of starch.
The primary frustration for the home cook is the “mush factor.” Many attempts at a crispy rice recipe result in grains that are greasy on the outside but unpleasantly soft or soggy in the center. Achieving a professional-grade result requires a nuanced understanding of amylopectin, moisture migration, and heat management. This guide provides a definitive technical deconstruction of how to transform soft, steamed grains into a structural masterpiece of crunch.

Ingredient Breakdown: The Chemistry of Starch
To execute a flawless crispy rice recipe, your choice of raw materials dictates the final structural integrity of the dish.
1. Short-Grain Sushi Rice (The Structural Binder)
For the most successful crispy rice squares, short-grain Japanese varieties are superior. These grains are high in amylopectin, a starch that becomes “sticky” when cooked. This stickiness is essential; it acts as a natural glue, allowing the rice to be compressed into a block that won’t disintegrate when it hits the hot oil.
2. Rice Vinegar and Sugar (The Flavor and Caramelization)
In this crispy rice recipe, seasoning serves two purposes. While the vinegar provides a bright acidity to balance the fatty oils of frying, the sugar is a chemical catalyst. During the frying process, the sugar undergoes the Maillard reaction more rapidly than the starch alone, assisting in that deep, mahogany-gold color.
3. Neutral Oil with a High Smoke Point
Grapeseed, avocado, or refined peanut oil are the preferred mediums. Avoid extra virgin olive oil or butter for the primary fry; their low smoke points will cause them to burn and turn bitter before the rice has sufficiently dehydrated to become crispy.
4. Toasted Sesame Oil (The Aromatic Finish)
Sesame oil is a finishing element. Because it is highly unrefined, its flavor molecules are fragile. We incorporate it into the rice before pressing to ensure the aroma is locked into the grain, rather than burned off in the pan.
Preparation Strategy: Moisture Management
The secret to a world-class crispy rice recipe isn’t the frying—it’s the drying. If your rice contains too much internal moisture, the steam will try to escape during frying, resulting in a “steamed-fried” texture that is rubbery rather than crunchy.
- The Overnight Chill: You must use “day-old” rice or rice that has been spread thin on a tray and refrigerated for at least 4 hours. This encourages retrogradation—a process where the starch molecules rearrange into a more crystalline, firm structure.
- The Compression Method: For those making crispy rice squares, the rice must be packed into a plastic-lined tray with significant force. This eliminates air pockets. Air pockets trap steam, and steam is the enemy of the crunch.
- The Knife Technique: When cutting chilled rice blocks, use a damp, extremely sharp knife. This prevents the starch from sticking to the blade and tearing the clean edges of your squares.
Cooking Instructions
1. The Rice Foundation
Rinse 2 cups of Sushi rice in cold water until the water runs clear. Cook in a rice cooker or stovetop with a 1:1.1 ratio of water (slightly less water than usual to keep the grain firm). Once cooked, fold in 2 tbsp rice vinegar, 1 tbsp sugar, 1 tsp salt, and 1 tsp sesame oil.
2. The Press
Line an 8×8-inch pan with plastic wrap. Transfer the warm rice to the pan. Place another sheet of plastic on top and use a heavy weight (like a second pan or a brick) to compress the rice. Refrigerate for 4 to 24 hours.
3. The Portioning
Lift the rice block out of the pan. Using a wet knife, cut the block into 1×2-inch rectangles. Ensure the edges are sharp and straight; ragged edges will burn more quickly than the body of the square.
4. The Shallow Fry
Heat ¼ inch of neutral oil in a heavy-bottomed stainless steel or cast-iron skillet over medium-high heat. The oil should reach approximately 360°F (182°C).

5. The Searing Phase
Carefully place the rice squares into the oil. Do not crowd the pan. If the squares touch, they will fuse together. Fry for 3–5 minutes per side.
6. The Indicators
Do not flip the rice until you see a golden “halo” forming around the base of the square. The rice will naturally release from the pan when the crust is sufficiently formed. Once both sides are golden and shattered-glass crispy, move to a wire rack (not a paper towel) to drain.
Flavor & Texture Indicators
A professional crispy rice recipe is evaluated through a “sensory audit”:
- The Sound: When tapped with a fingernail or a spoon, a piece of crispy rice should sound hollow and metallic, much like a well-baked baguette crust.
- The Cross-Section: Upon biting, the exterior should shatter instantly, while the very center should retain a slight, chewy “al dente” bounce. If the whole square is hard, it was fried too long at too low a temperature.
- The Color Equilibrium: The goal is Giallo Oro (Golden Gold). If there are black specks, your oil was dirty or too hot. If it is pale, the starch hasn’t sufficiently caramelized.
Adjustments for Different Skill Levels
For the Beginner
If you find the compression and cutting difficult, try the “Pan-Cake” method. Simply spread a thin layer of seasoned rice into a hot, oiled skillet and fry it as one large disc (like a hash brown). This removes the need for chilling and precise cutting while still delivering the flavor of a top-tier crispy rice recipe.
For the Intermediate Cook
Focus on the “Cornstarch Dusting.” Before frying your squares, lightly dredge the exterior in a tiny amount of cornstarch. This absorbs any lingering surface moisture and creates an even more dramatic, “extra-crunchy” micro-textured crust.
For the Advanced Artisan
Experiment with “Infused Oils.” Before frying the rice, steep ginger, scallion whites, and dried chilies in your frying oil at a low temperature, then strain. Use this aromatic oil to fry the rice, embedding a complex flavor profile directly into the crispy crust.
Storage & Shelf Life
The Achilles’ heel of any crispy rice recipe is humidity.
- Pre-Fried Storage: The compressed rice blocks can live in the refrigerator for up to 3 days. This makes it an ideal “prep-ahead” dish for dinner parties.
- Post-Fry Care: Crispy rice is best consumed within 30 minutes of frying. However, if you have leftovers, do not refrigerate them immediately. Leave them at room temperature in a dry area.
- The “Re-Crisp”: If your rice squares go soft, do not use the microwave. Place them in an air fryer or a 400°F oven for 5 minutes. The dry heat will re-evaporate the moisture and restore the crunch.
Reader Questions
Q: Can I use Jasmine rice for this crispy rice recipe? A: You can, but it is much more difficult. Jasmine rice is a long-grain variety with less amylopectin. It is “fluffier” and prone to falling apart. If you use Jasmine, you must add a small amount of cornstarch or an egg white as a binder to the cooked rice to help it hold its shape.
Q: Why does my rice stick to the pan even though I used oil? A: Two possibilities: either your pan wasn’t hot enough when the rice was added, or you are trying to flip it too early. Starch “grabs” the pan initially; only after the crust forms does it “release.” Patience is a key ingredient in this crispy rice recipe.
Q: Can I bake these instead of frying? A: You can, but the texture will be different. To bake, brush the squares generously with oil and bake at 425°F for 20 minutes, flipping halfway. It will be “crunchy,” but it lacks the characteristic “bubbly” shattered texture that only hot oil submersion can provide.
Q: My rice is popping and splashing oil everywhere. Is that normal? A: Popping is caused by water hitting hot oil. If your rice is popping excessively, it means it wasn’t dried or chilled long enough. Ensure you pat the blocks dry with a paper towel before they hit the pan.