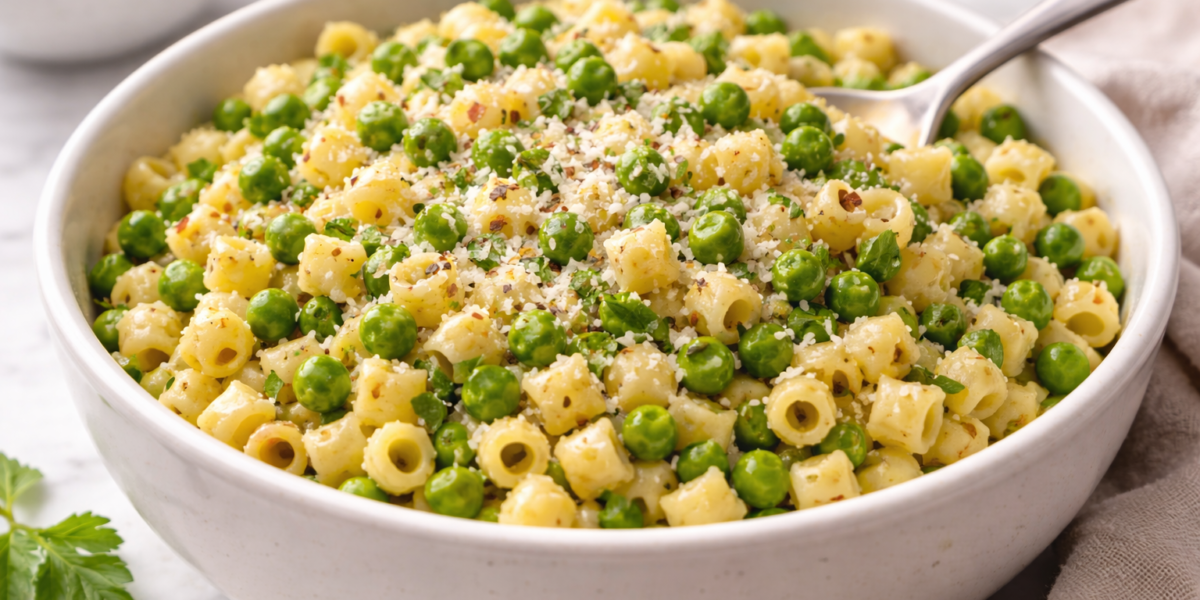
Ditalini Pasta Recipe A frequent frustration with any ditalini pasta recipe is the “disappearing act.” Because ditalini—which translates to “little thimbles”—are so small, they are often relegated to the background of minestrone or pasta e fagioli, where they easily become overcooked, waterlogged, and lost in a sea of broth. Many home cooks struggle to make ditalini the star of the plate, often ending up with a texture that feels more like a side dish than a cohesive, professional-grade pasta course.
The culinary challenge with ditalini is its high surface-area-to-volume ratio. These small tubes are designed to catch sauce both inside and out, but their diminutive size means the window between al dente and “mushy” is incredibly narrow. This guide provides a definitive ditalini pasta recipe that moves beyond the soup pot. We are focusing on a Creamy Garlic and Toasted Breadcrumb Ditalini, a dish that treats this shape with the respect of a main course, ensuring every “thimble” remains distinct and perfectly coated.
Why This Recipe Works
This ditalini pasta recipe succeeds by treating the small pasta shape like a risotto—a technique often called pastasciutta—where the starch is harnessed rather than rinsed away.
- Starch Concentration: Because ditalini are small, they release a significant amount of surface starch. By finishing the pasta directly in the sauce with a splash of pasta water, we create an ultra-glossy emulsion that “glues” the flavor to the noodle.
- Internal Sauce Capture: The hollow center of the ditalini is a vacuum for flavor. We utilize a sauce with a specific viscosity that flows into the tubes, ensuring every bite is an explosion of garlic butter rather than just a coated exterior.
- The Toasted Contrast: To solve the problem of “textural monotony,” we incorporate a crispy pangrattato (toasted breadcrumbs). This provides a necessary crunch that balances the soft, bouncy nature of the small pasta.
- Uniformity of Ingredients: This recipe pairs ditalini with finely minced aromatics. By matching the size of the ingredients to the size of the pasta, we ensure a perfect distribution of flavor in every spoonful.
Ingredients & Measurements
For a professional-grade ditalini pasta recipe, precision in your dairy-to-starch ratio is essential for a silky finish.
The Pasta
- 1 lb (450g) Dried Ditalini Pasta: Look for bronze-cut varieties; the rougher exterior helps the sauce adhere.
- 4 Quarts Water: Heavily salted (it should taste like the sea).
The Sauce Base
- 4 tbsp Unsalted Butter: High-fat European style is best for a richer mouthfeel.
- 6 Cloves Garlic: Thinly sliced (not minced) to provide sweet, mellow chips of flavor.
- 1/2 cup Heavy Cream: To provide a luxurious, stable base.
- 1/2 cup Freshly Grated Parmigiano-Reggiano: For salt and protein-driven thickening.
- 1 tsp Red Pepper Flakes: For a “back-of-the-throat” warmth.
The Pangrattato (Crunch Layer)
- 1/2 cup Panko Breadcrumbs: Or coarse homemade crumbs.
- 1 tbsp Extra Virgin Olive Oil: To toast the crumbs.
- 1 tsp Lemon Zest: To brighten the finish.
- 2 tbsp Fresh Parsley: Finely chopped.
Step-by-Step Cooking Guide
1. The Crisp Factor (Pangrattato)
Before starting the pasta, heat the olive oil in a small skillet over medium heat. Add the breadcrumbs and stir constantly for 3–5 minutes until they are the color of a toasted almond. Remove from heat and stir in the lemon zest and parsley. Set this aside; it is the “lid” that keeps your ditalini pasta recipe from feeling one-dimensional.
2. The Pasta Boil
Bring your salted water to a rolling boil. Add the ditalini. Critical Timing: Check the package instructions and subtract 3 minutes from the al dente time. If the package says 10 minutes, you will boil for only 7. The pasta must be significantly undercooked when it enters the sauce.
3. The Garlic Infusion
While the pasta boils, melt the butter in a large skillet over medium-low heat. Add the sliced garlic and red pepper flakes. Sauté slowly. You aren’t looking for a dark brown sear; you want the garlic to turn translucent and soft, infusing the butter with its essential oils.
4. The Starch Transfer
Before draining the pasta, reserve 1.5 cups of the cloudy pasta water. Drain the ditalini and add them directly to the skillet with the garlic butter. Increase the heat to medium.
5. The Emulsion (The “Mantegatura”)
Add 1/2 cup of the reserved pasta water and the heavy cream to the skillet. Stir vigorously with a wooden spoon. The friction, combined with the starch from the water and the fat from the cream, will begin to create a thick, bubbling sauce.
6. The Final Fold
Once the liquid has reduced by half and the pasta is perfectly al dente, turn off the heat. Stir in the Parmigiano-Reggiano. The residual heat will melt the cheese into the sauce without making it stringy. If the sauce looks too thick, add another splash of pasta water.
Common Mistakes to Avoid
- Overcooking in the Water: Because ditalini are so small, they continue to cook rapidly once added to the sauce. If you boil them to completion in the water, they will turn into a mushy paste in the skillet.
- Discarding All Pasta Water: The water is the binder. Without it, your ditalini pasta recipe will result in a greasy puddle of butter at the bottom of the bowl instead of a cohesive sauce.
- Using Pre-Shredded Cheese: Pre-shredded cheese is coated in cornstarch to prevent clumping. This will make your sauce “grainy.” Always grate your Parmesan fresh for a smooth melt.
- Walking Away from the Garlic: Sliced garlic can turn from sweet to bitter in 10 seconds. Keep your heat low and your eyes on the pan.
Timing & Doneness Indicators
Efficiency with small pasta shapes requires a focus on sensory cues rather than just the clock.
Serving Suggestions
A ditalini pasta recipe is best served in shallow bowls to allow the sauce to settle into the tubes.
- The Finish: Top each bowl generously with the lemon-parsley pangrattato. The contrast between the creamy pasta and the sharp, crunchy crumbs is the hallmark of a professional dish.
- The Green Element: Fold in a handful of baby arugula or peas during the “Final Fold” stage. The arugula will wilt slightly and provide a peppery bite.
- The Protein Boost: This recipe acts as a perfect bed for seared shrimp or scallops, which mimic the “bite-sized” nature of the ditalini.
- The Wine Pairing: Serve with a crisp, high-acidity white wine like a Vermentino or Pinot Grigio to cut through the richness of the garlic butter.
FAQ: Solving Your Ditalini Frustrations
Q: My ditalini always get stuck inside each other. How do I prevent this? A: This usually happens if the pasta isn’t stirred immediately upon entering the boiling water. For the first 60 seconds of boiling, stir the ditalini constantly to ensure the starch sets individually on each tube.
Q: Can I use this ditalini pasta recipe for meal prep? A: Ditalini are excellent for meal prep because they don’t tangle like spaghetti. However, they absorb sauce as they sit. When reheating, add a tablespoon of water or milk to loosen the sauce back to its original creaminess.
Q: Is ditalini the same as tubetti? A: They are very similar! Tubetti are slightly longer than ditalini. You can use this ditalini pasta recipe interchangeably with tubetti or even maccheroni, though the cooking times may vary by 1–2 minutes.
Q: Why does my sauce look “broken” or oily? A: A broken sauce usually means the heat was too high when the cheese was added, or you didn’t use enough pasta water. The starch in the water acts as a stabilizer. If it breaks, add a teaspoon of cold water and whisk vigorously off the heat to bring the emulsion back together.