The Ultimate Guide to Perfect Shredded Chicken: Master the Foundation of Quick Weeknight Meals
Shredded Chicken Recipes We’ve all been there: you follow a recipe for “tender shredded chicken,” only to end up with a pile of rubbery, flavorless protein that feels more like chewing on a pencil eraser than a gourmet meal. Perhaps you tried boiling it on high heat for an hour, or maybe you tossed it in a slow cooker and forgot about it, resulting in mushy fibers that have lost all structural integrity.
The “shredded chicken struggle” is real. It’s either too dry to swallow without a gallon of sauce or so bland it disappears into the background of your tacos. But when done correctly, shredded chicken is the ultimate culinary “blank canvas”—the MVP of meal prep that can transform into enchiladas, Cobb salads, buffalo dips, or hearty soups in under five minutes.
This guide is designed to move beyond the basic “boil and pull” method. We are diving into the science of moisture retention, the art of seasoning, and the most efficient techniques to get professional-grade results every single time.
Why This Recipe Work
Most home cooks fail at shredded chicken because they treat it as a byproduct rather than a primary dish. This recipe works because it prioritizes three pillars of poultry perfection:
- Low and Slow Thermal Transition: By using a gentle poaching or pressure-cooking method rather than a rolling boil, we prevent the muscle fibers from seizing up and squeezing out their juices.
- Aromatic Infusion: We don’t just use water. By building a flavor-dense poaching liquid (a court-bouillon), the chicken seasoned from the inside out.
- The “Rest and Render” Technique: Shredding chicken while it’s piping hot allows steam to escape, which dries out the meat. We use a specific cooling window to ensure the juices redistribute before the fibers are separated.
Ingredients & Measurement
To yield approximately 4 cups of shredded chicken (enough for 2-3 family meals), you will need the following.
The Protein
- 2 lbs (approx. 900g) Boneless, Skinless Chicken Breasts or Thighs: For the best texture, use a 50/50 mix. Breasts provide clean, long shreds, while thighs add fat and richness.
The Infusion Liquid
- 4 cups Low-Sodium Chicken Bone Broth: Provides a deeper “chicken” flavor than plain water.
- 1 Medium Yellow Onion: Peeled and quartered (no need to chop finely).
- 4 Cloves Garlic: Smashed to release oils.
- 2 Bay Leaves: Essential for that subtle, savory herbal undertone.
- 1 tsp Black Peppercorns: Whole peppercorns provide a slow-release heat without discoloring the meat.
- 1 tbsp Sea Salt: Critical for the osmosis process that keeps the meat seasoned.
Optional Flavor Boosters (Choose based on your final cuisine)
- Mexican: Add 1 tsp cumin and 1 dried ancho chili.
- Asian: Add a 2-inch knob of sliced ginger and 1 tbsp soy sauce.
- Italian: Add a sprig of fresh rosemary and 2 sprigs of thyme.
Step-by-Step Cooking Guide
Phase 1: The Cold Start
Place your chicken pieces in a large, heavy-bottomed pot (like a Dutch oven). It is a common mistake to add meat to boiling water. Starting with cold or room-temperature liquid allows the chicken and the broth to rise in temperature together, ensuring an even cook from the edge to the center.
Add your aromatics (onion, garlic, peppercorns, bay leaves) and pour the broth over the top until the chicken is submerged by at least an inch.
Phase 2: The Gentle Simmer
Place the pot over medium-high heat just until you see the first few bubbles break the surface. Immediately turn the heat down to the lowest setting. You are looking for a “lazy simmer”—barely any movement in the water.
Cover the pot with a tight-fitting lid. This traps the steam and maintains a consistent internal environment.
- Breasts: Simmer for 12–15 minutes.
- Thighs: Simmer for 18–20 minutes.
Phase 3: The Temperature Check
Using an instant-read thermometer, check the thickest part of the largest piece. You are looking for 165°F (74°C). However, if you hit 160°F, you can actually turn off the heat and let the chicken sit in the hot liquid for 5 more minutes; the carryover cooking will bring it to the safe zone without overcooking it.
Phase 4: The Shredding Technique
Remove the chicken from the liquid and place it on a rimmed baking sheet or in a large bowl. Stop! Do not shred yet. Let the meat rest for 10 minutes.
Once rested, use one of these three methods:
- The Two-Fork Method: The classic way. Hold the meat with one fork and pull away with the other along the natural grain.
- The Stand Mixer Hack: Place warm chicken in the bowl of a stand mixer with the paddle attachment. Turn to low for 30–60 seconds. This is the fastest way to handle large batches.
- The Hand Mixer Method: Similar to the stand mixer, use a handheld electric mixer in a high-sided bowl. It’s remarkably effective at creating a fine, uniform shred.
Common Mistakes to Avoid
1. Using a Rolling Boil
High heat causes the protein strands in chicken to contract violently. This creates a “tough” texture. If the water is dancing, your chicken will be rubber. Keep it to a gentle shiver.
2. Discarding the Poaching Liquid
That liquid is now “liquid gold.” It contains the fat and collagen rendered during the cook. Once you’ve shredded your chicken, drizzle about ¼ cup of this liquid back over the meat. This keeps it moist while it sits or during refrigeration.
3. Shredding “Against the Grain”
Look at the chicken breast; the fibers run in one direction. If you cut or pull across them, you get short, crumbly bits instead of the long, beautiful shreds perfect for tacos. Always pull parallel to the fibers.
4. Over-crowding the Pot
If you stack four layers of chicken in a small pot, the pieces in the middle will stay raw while the outside pieces turn to leather. Use a wide enough pot so the chicken can sit in a single, or at most, double layer.
Timing & Doneness Indicators
Understanding timing is the difference between a meal and a disaster. Use this table as a general reference:
Visual Cues:
- The “Opaque” Test: Raw chicken is translucent and pink. Cooked chicken is completely opaque and white (or slightly brownish for thighs).
- The “Flake” Test: If you press a fork into the meat and it resists or springs back like a sponge, it’s not ready. If it gives way and the fibers begin to separate easily, it’s done.
Serving Suggestions: The “Three-Way” Meal Prep
Once you have your master batch of shredded chicken, don’t just put it in a bowl. Try these three distinct profiles:
1. The Weeknight Taco Bar
Toss the shredded chicken with a splash of the poaching liquid, lime juice, and taco seasoning. Serve with charred corn tortillas, pickled red onions, and fresh cilantro.
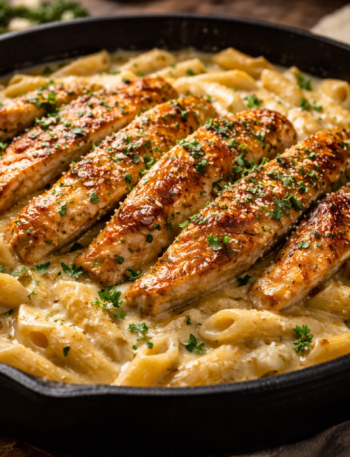
2. The High-Protein Pesto Pasta
While your pasta boils, sauté the shredded chicken in a pan with a little olive oil just to get the edges crispy. Toss with store-bought pesto, sun-dried tomatoes, and penne.
3. The Classic “Bakery Style” Chicken Salad
Mix cooled shredded chicken with Greek yogurt (or mayo), diced celery, halved grapes, and toasted pecans. This is significantly better than canned chicken and stays fresh in the fridge for 4 days.
FAQ: Solving Your Cooking Frustrations
Q: Why is my shredded chicken always so dry, even when it’s sitting in sauce? A: You likely overcooked it during the initial phase. Once the protein fibers are over-shrunk from high heat, they lose the ability to “hold” moisture. Even if you douse it in sauce, the sauce just sits on the outside. Next time, pull the chicken out at 160°F and let it finish via carryover cooking.
Q: Can I use frozen chicken for this recipe? A: You can, but it’s not recommended for poaching. Frozen chicken releases a lot of water and can result in a “spongy” texture. If you must use frozen, the Instant Pot is your best bet—add 5 minutes to the pressure cook time.
Q: How long does shredded chicken last in the freezer? A: Shredded chicken is a freezer superstar. Store it in airtight Ziploc bags with a tablespoon of the poaching liquid. It will stay high-quality for up to 3 months. To defrost, place it in the fridge overnight.
Q: My chicken has a weird “metallic” or “gamey” taste. What happened? A: This usually happens when the chicken isn’t seasoned during the cooking process. If you boil it in plain water, the water actually pulls flavor out of the meat. Always use a salted broth or heavily seasoned water to ensure a savory profile.
Q: Can I do this with a whole chicken? A: Absolutely. This is essentially making a “boiled dinner.” The benefit is that the bones from the whole bird create an incredible stock. The downside is the labor of picking the meat off the bones and skin once it’s cooked.
The secret to a stress-free kitchen isn’t found in expensive gadgets, but in mastering foundations like this. By controlling your heat and respecting the “rest” period, you turn a humble chicken breast into a gourmet building block.